How to Create a Menu with the Navigation Block
Are you ready to create a Navigation menu? In Block Themes, you will use the Navigation block to create a Navigation menu while designing your site.
Objectives
After completing this lesson, participants will be able to:
- Set up a Navigation menu with a block theme.
- Arrange Navigation block items in a block theme.
Prerequisite Skills
Participants will get the most from this lesson if they have familiarity with:
Readiness Questions
- Have you created a Navigation menu in classic themes?
- Have you ever had to recreate a Navigation menu because you changed themes?
Materials Needed
- A local install of WordPress
- Demo content
- A block theme, such as Twenty Twenty Two
Notes for the Presenter
- It will be helpful for you to have a local site created before this lesson, including the demo content for Theme Unit Test Data and Gutenberg Data
Lesson Outline
- Show where the Navigation menu block is located
- Configure a small Navigation menu
- Demonstrate all options with the Navigation block toolbar and Options > Settings
Exercises
Create a secondary Navigation menu
Participants have watched you create a Navigation menu. Have them create their own Navigation menu to use in a secondary location, such as a custom template for a social profile landing page, or a sidebar widget.
Assessment
You can include the Site Logo in a Navigation menu.
- True
- False
Answer: 1. True
Navigation menus created in classic themes are available in block themes.
- True
- False
Answer: 1. True
You can manage your Navigation block with List View
- True
- False
Answer: 1. True
Additional Resources
- Navigation block support doc
Example Lesson
The Navigation block is a feature within block themes as a way to manage your website’s navigation. Before the Navigation block, we managed website navigation by going to Appearance > Menu. When you use a Block theme, that will happen within the Editor, giving you a live preview of your menu.
How to Add Links to the Navigation Menu
There are several ways to add links to your Navigation menu. Start at Appearance > Editor. Then select the Navigation block. You can select the block yourself, or use the List View.
How to Select an Existing Menu
If you have previously created menus, they will be available when using Select menu. If you have a menu created with a classic theme, see the Classic Menus section.
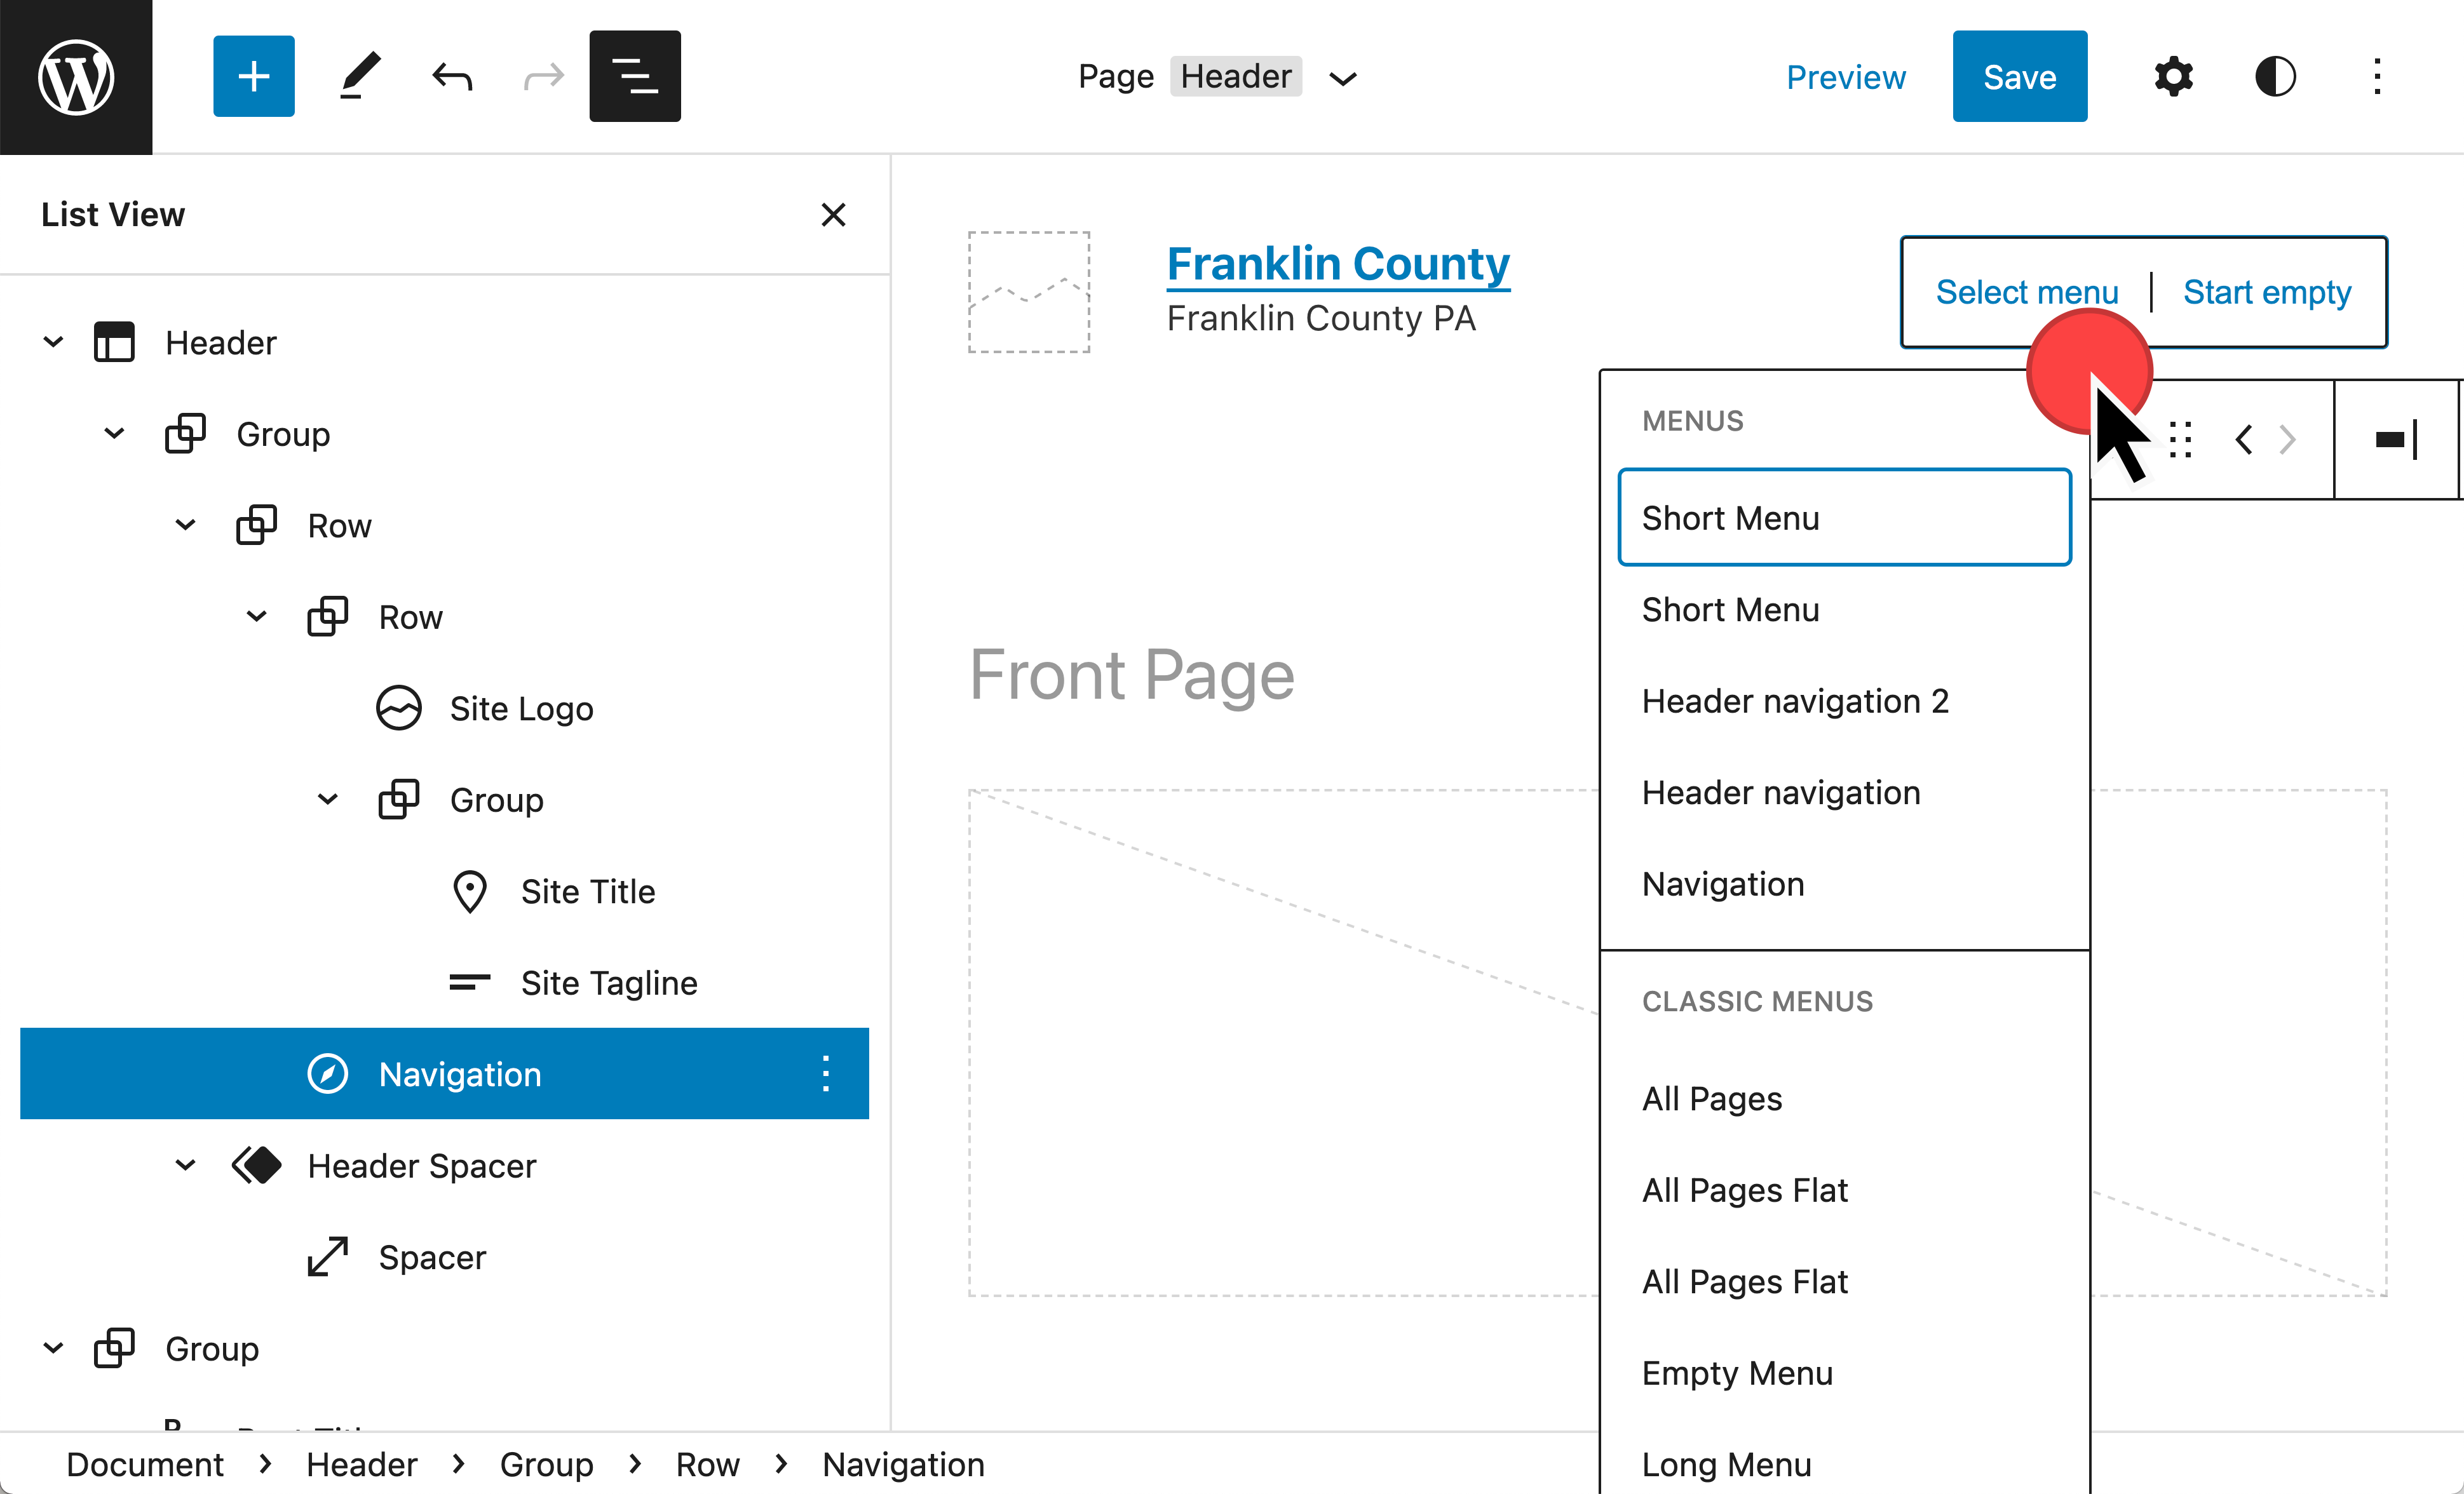
How to Create a New Navigation Menu
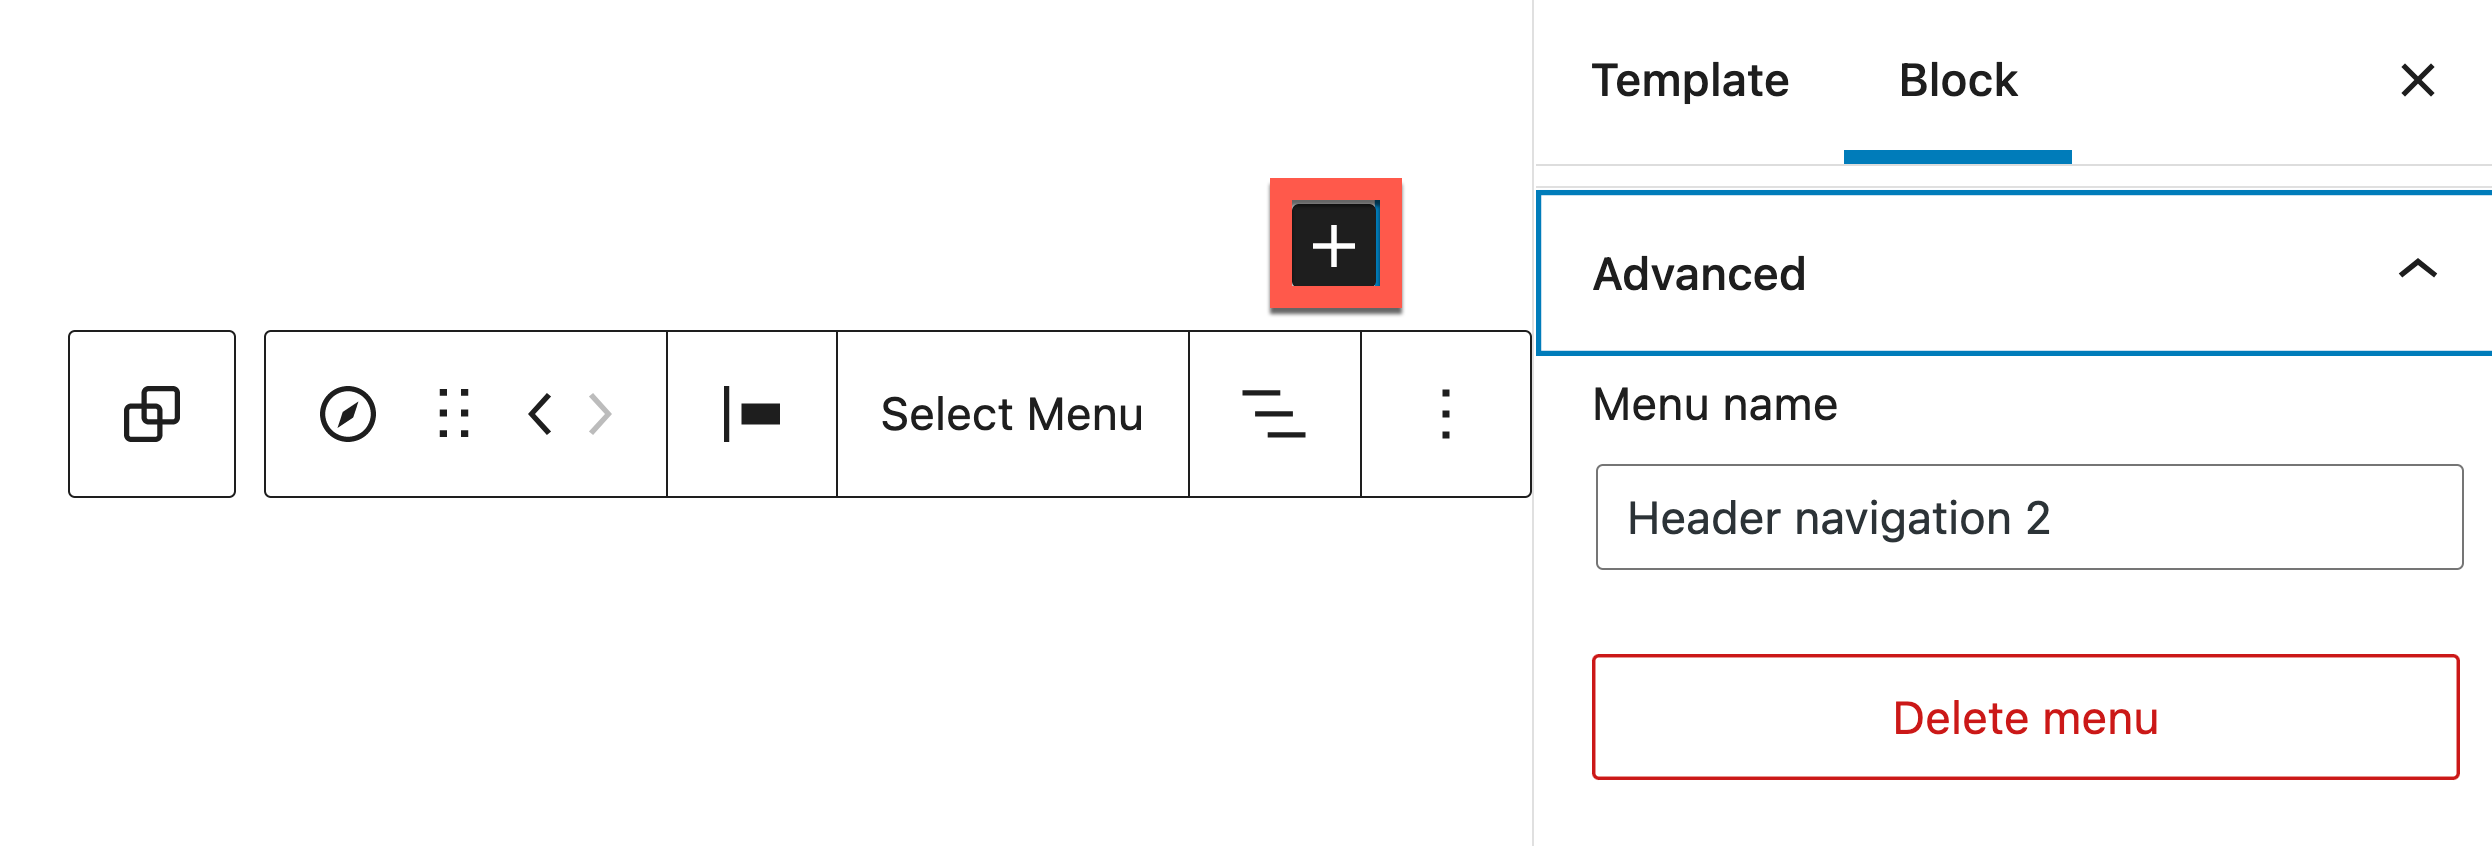
When you select Start Empty, the Navigation menu will look like a block inserter prompt. Use this to add links to specific pages.
In the Block options at right, within Advanced, you can rename the menu.
How to Customize the Navigation Menu
Now that the Navigation menu is started, it is time to add links and finish configuring items.
How to Add Navigation Menu Items
After selecting the + Block inserter prompt, the text will shift to an Add link prompt. Here you can search for the name of a page or post already created.
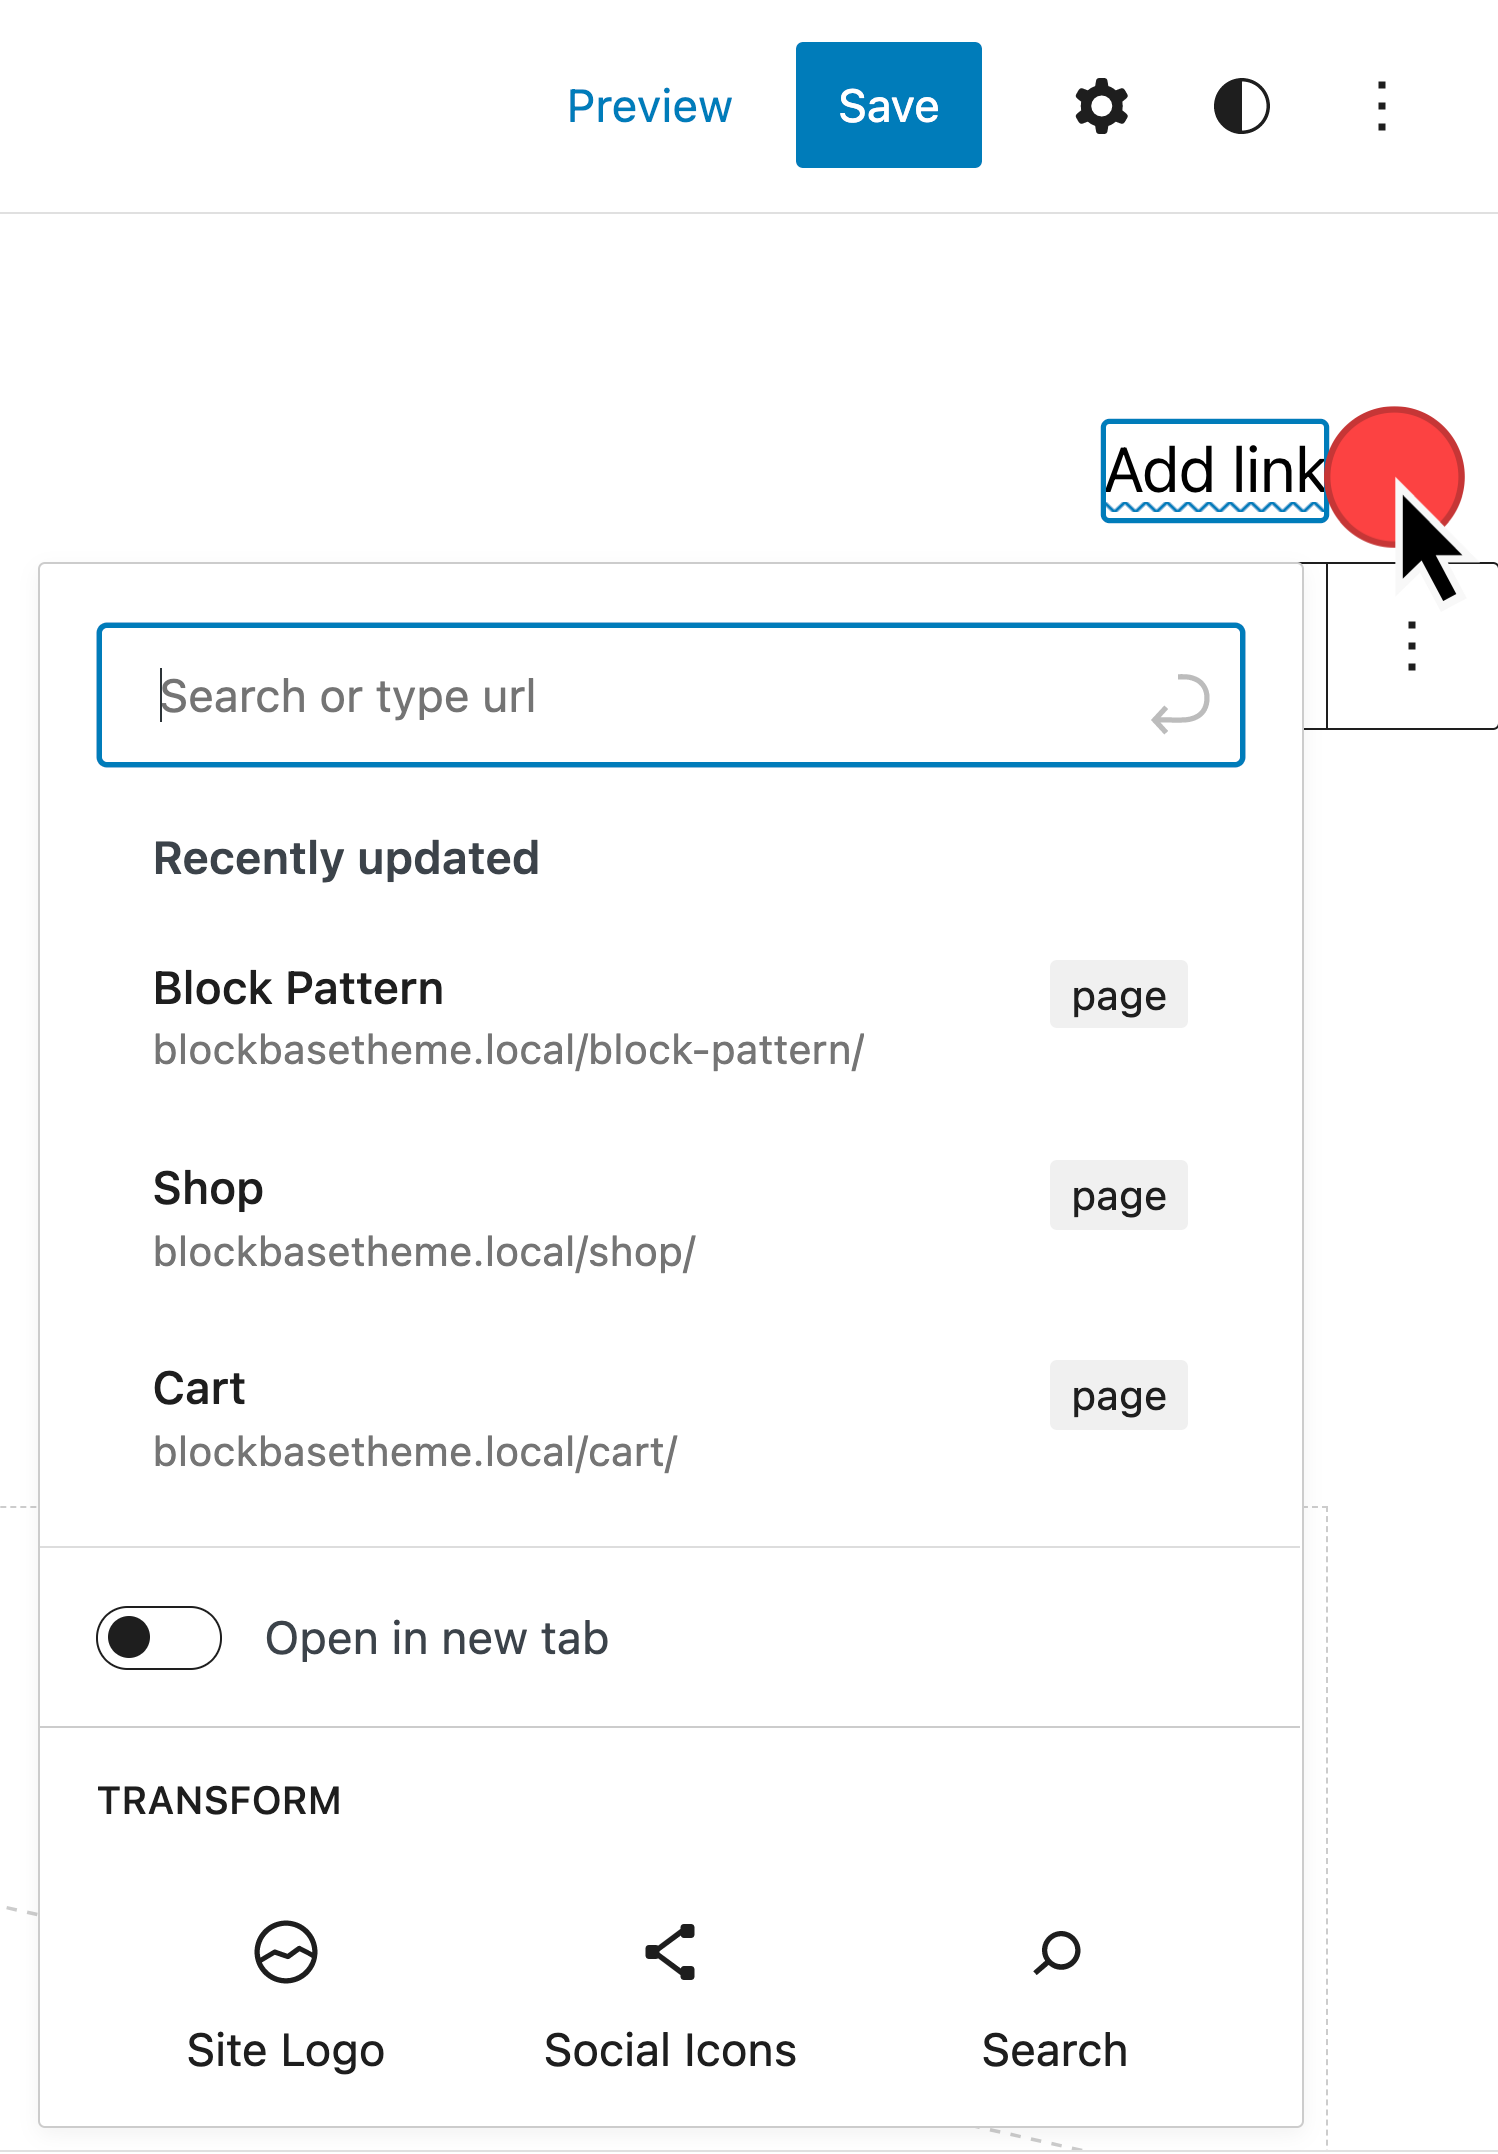
It may be helpful to have a second tab open displaying Pages > All Pages to find the names of pages.
To add a second Navigation item, place the cursor at the end of the initial menu link. Hit Enter and an additional Add link prompt will display.

Notice that you can also use this prompt to create draft pages.

How to Add Submenu Navigation Links
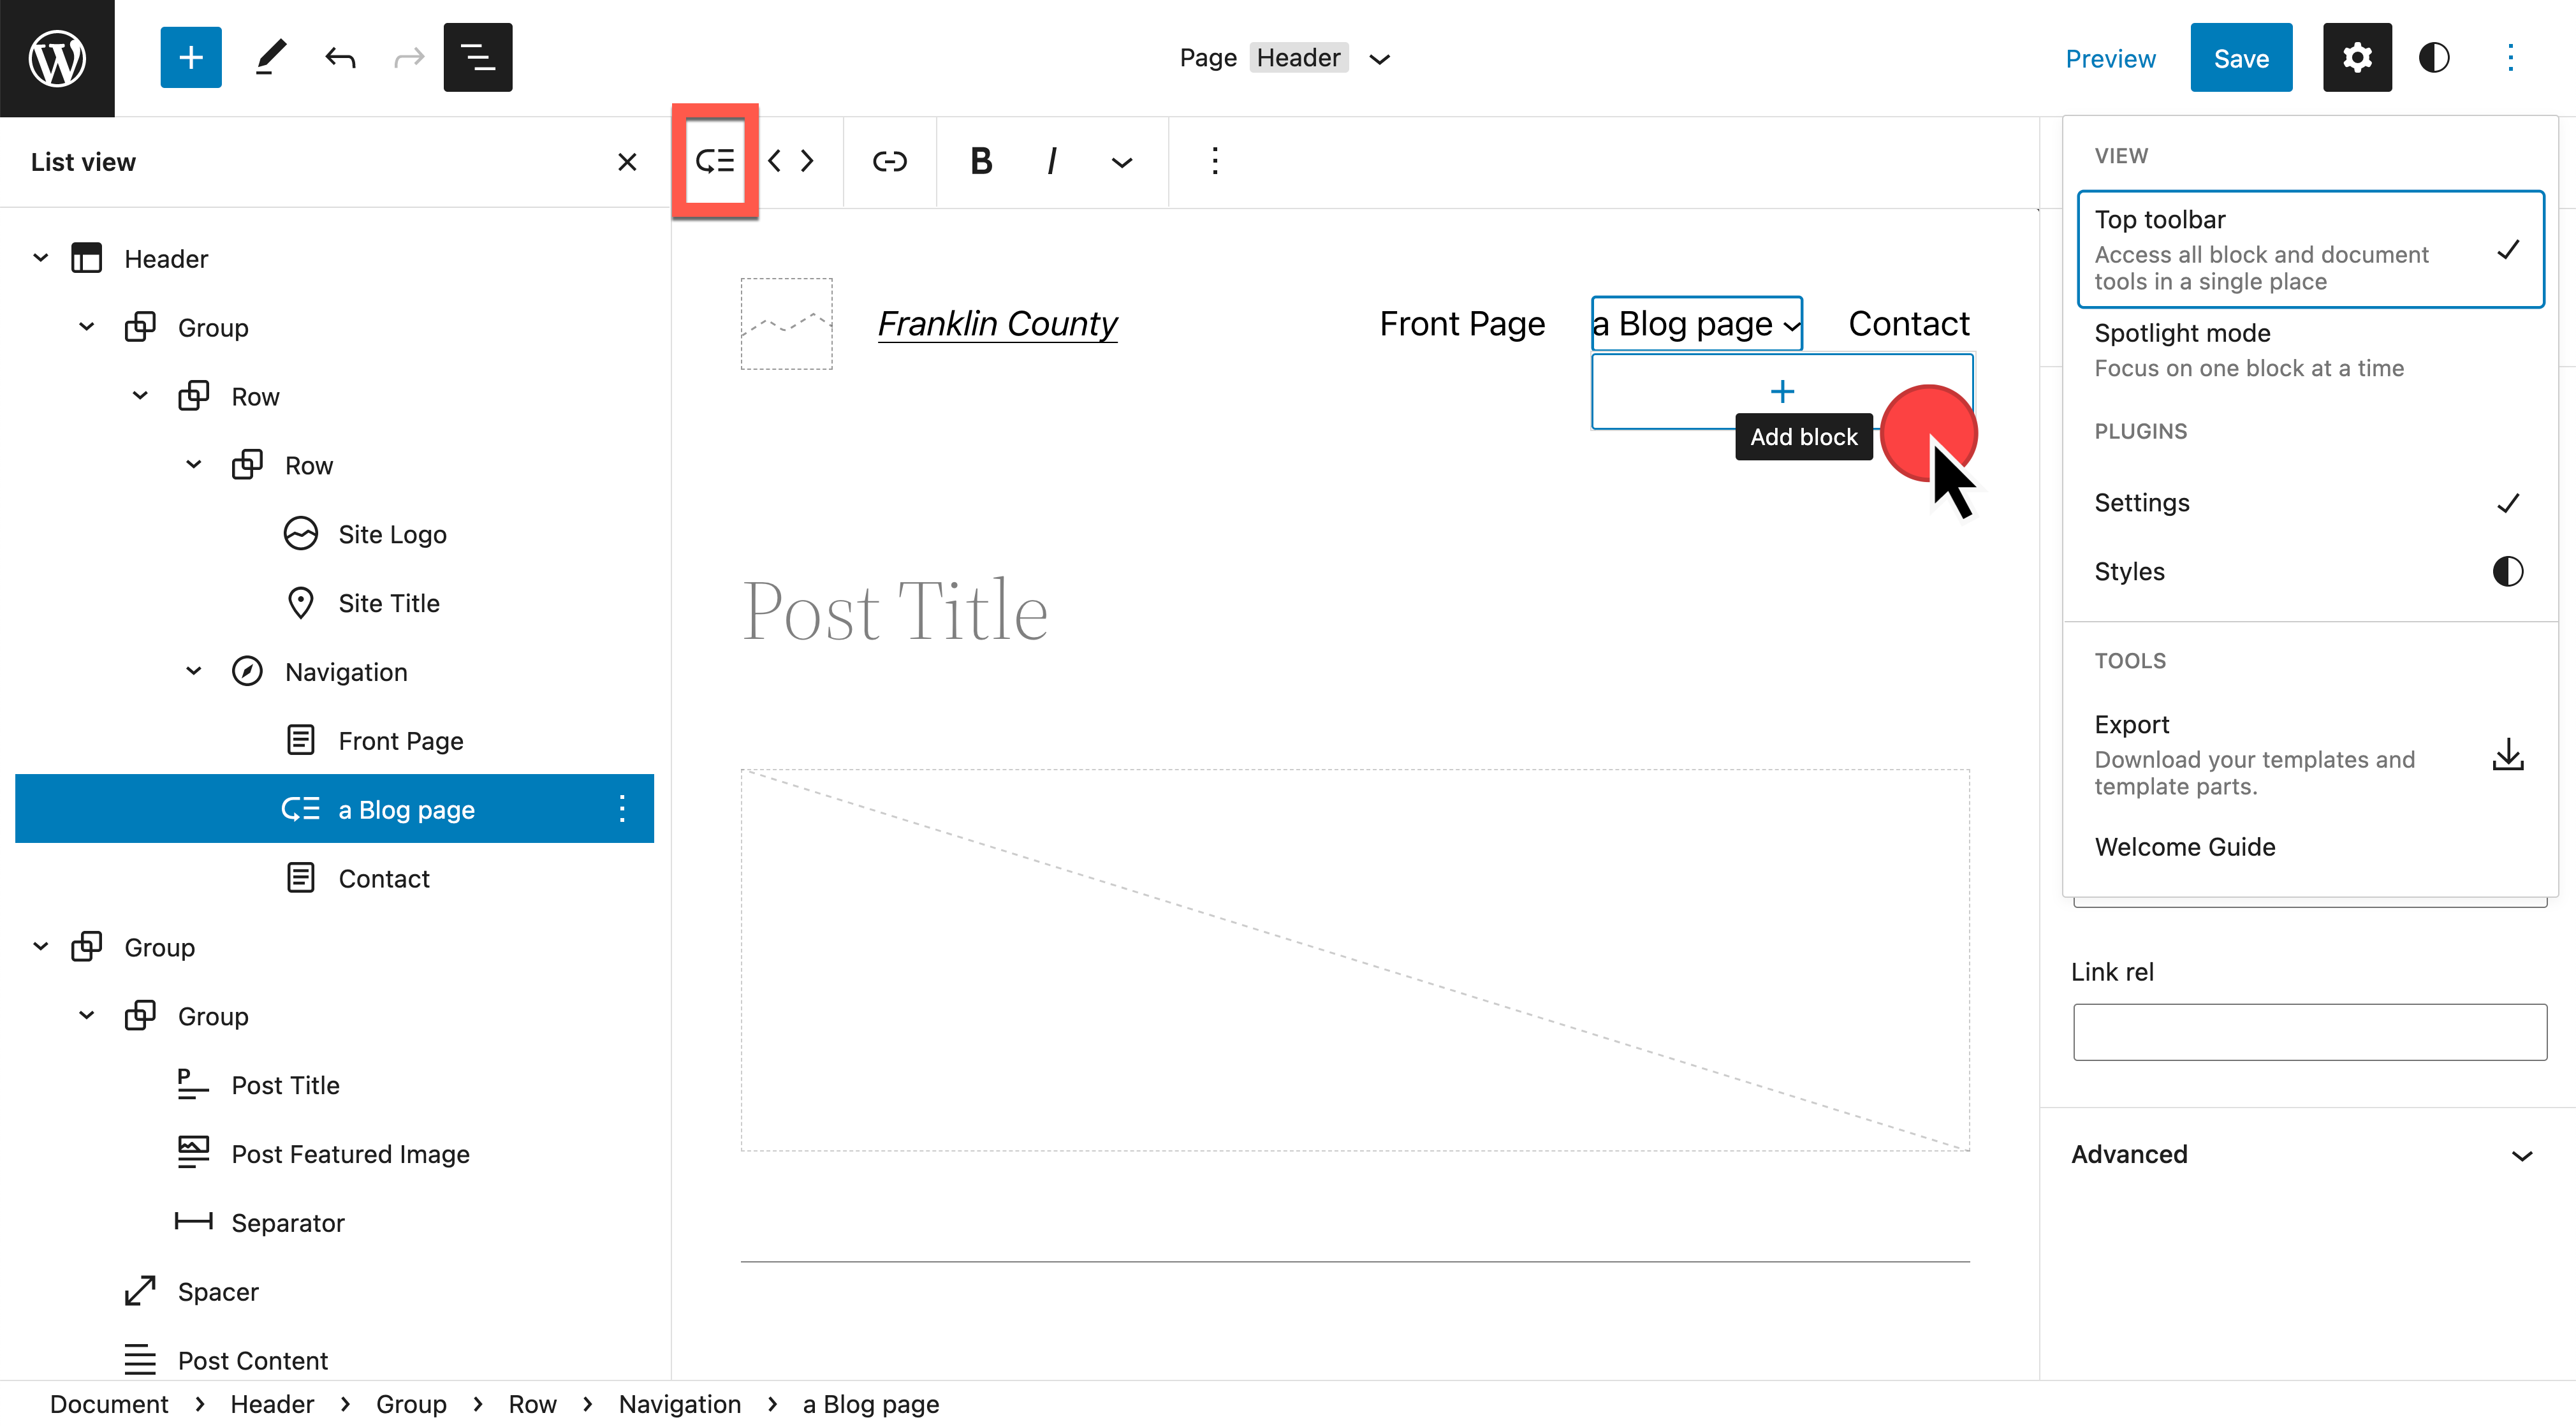
Here we have used the Options (3 dots or kebab menu at right) to enable the top toolbar for easier viewing while adding the additional Navigation item so that the block toolbar does not block the visibility of submenu items.
To add an additional layer within the sub-navigation, repeat the process.
Ordering Navigation Menu Items
After getting the menu items in place, you may be ready to move where these links are located.
You can use the Move left or Move right options.

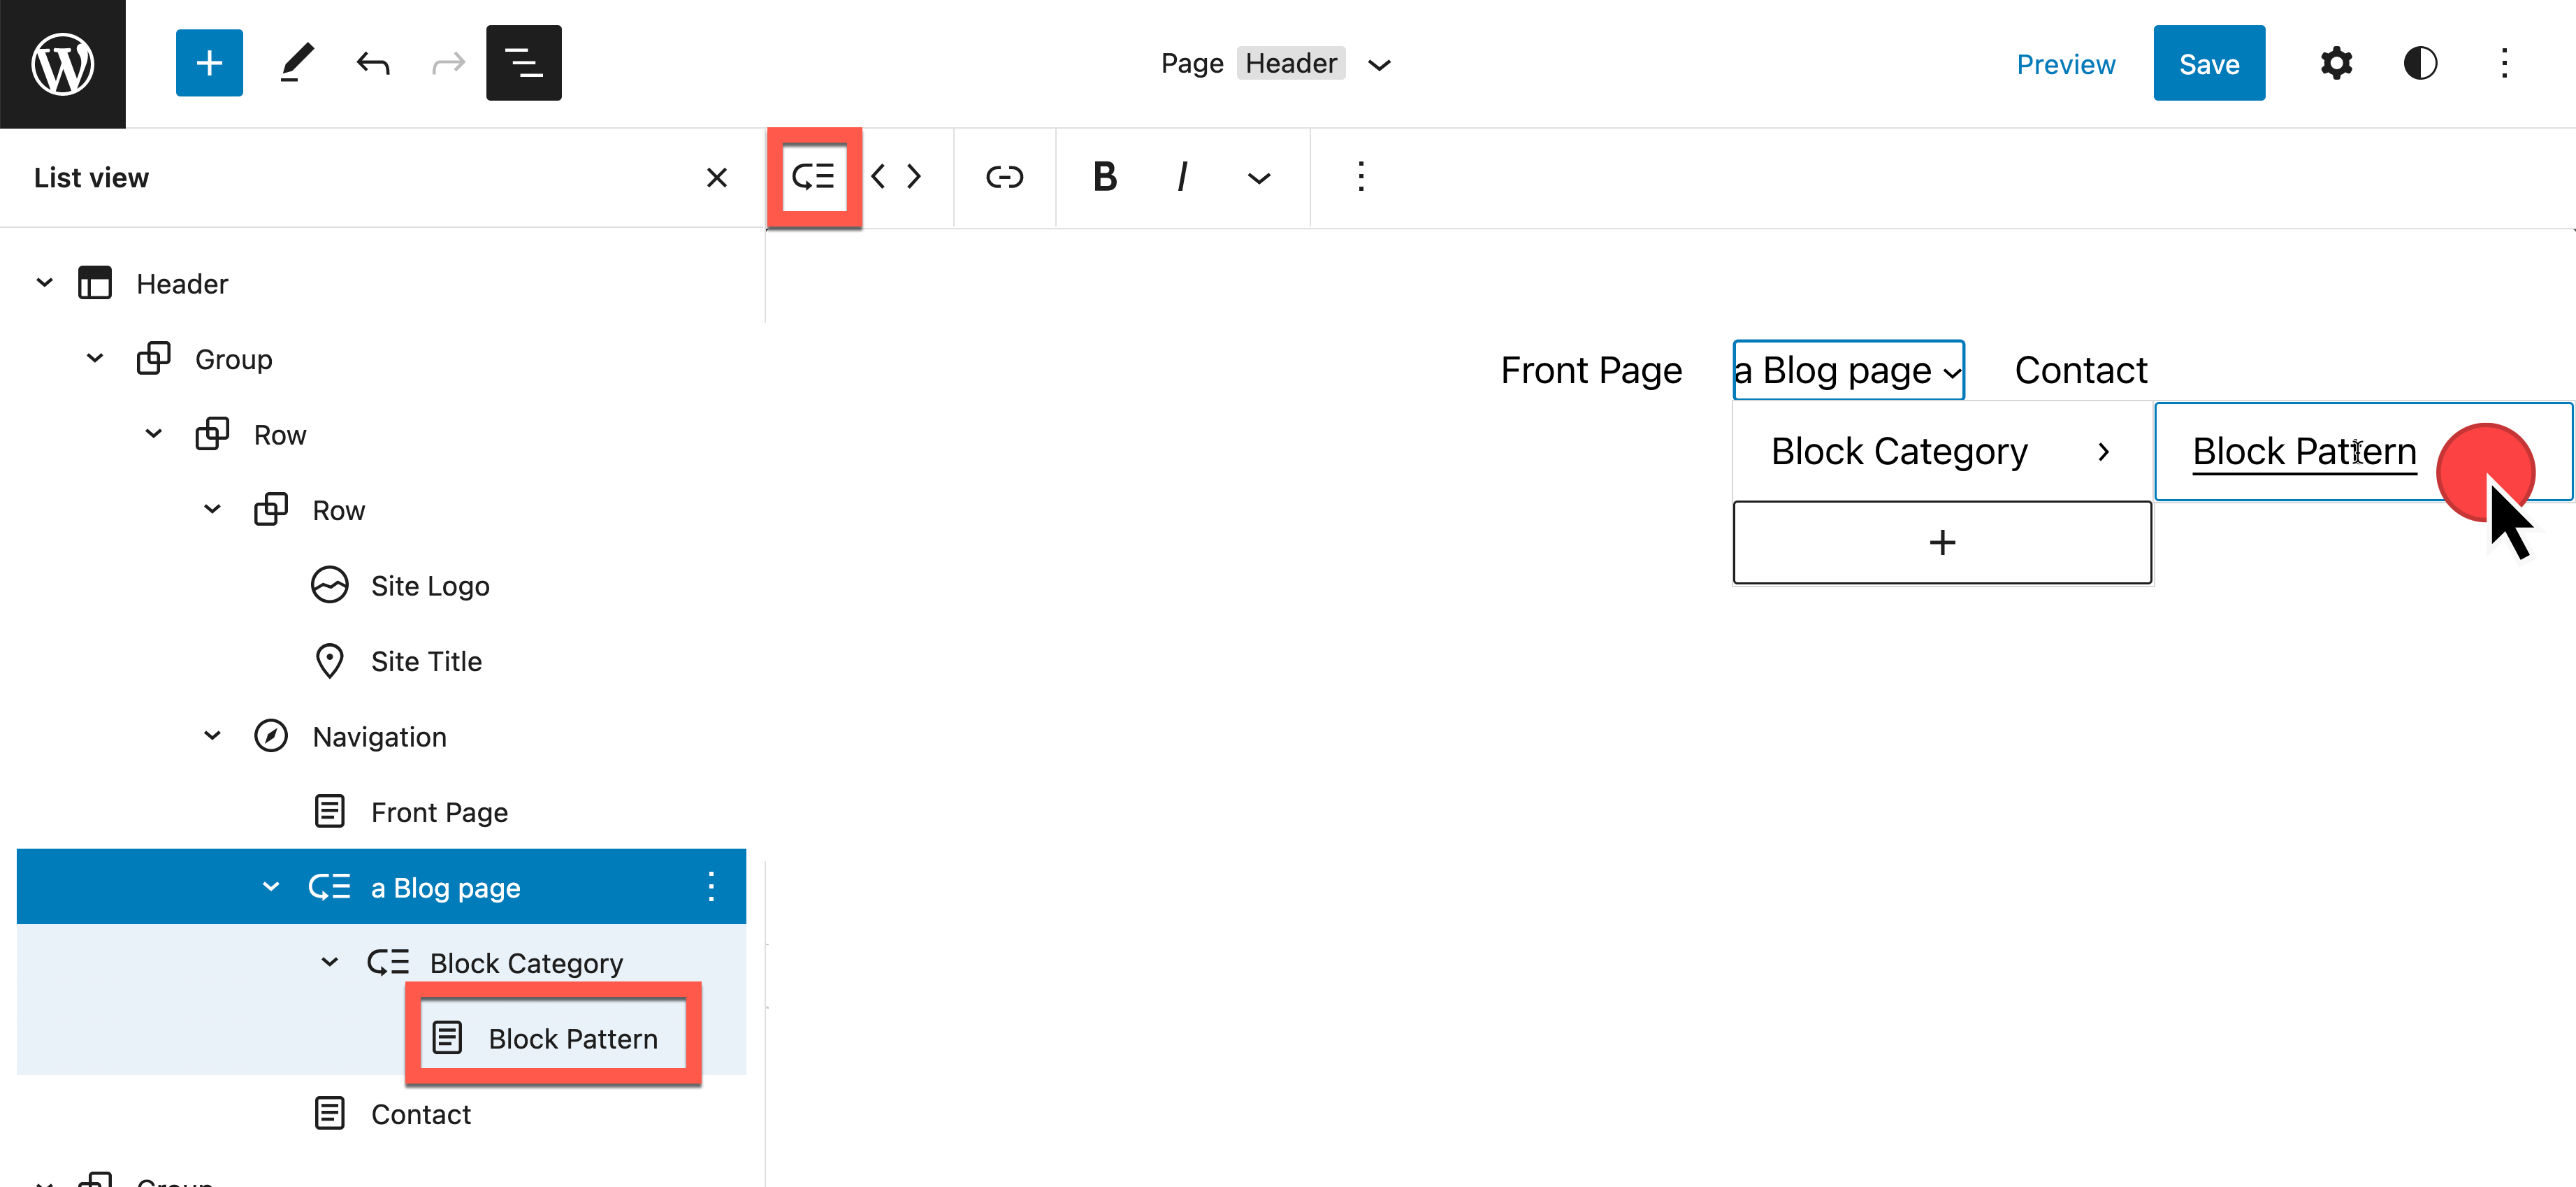
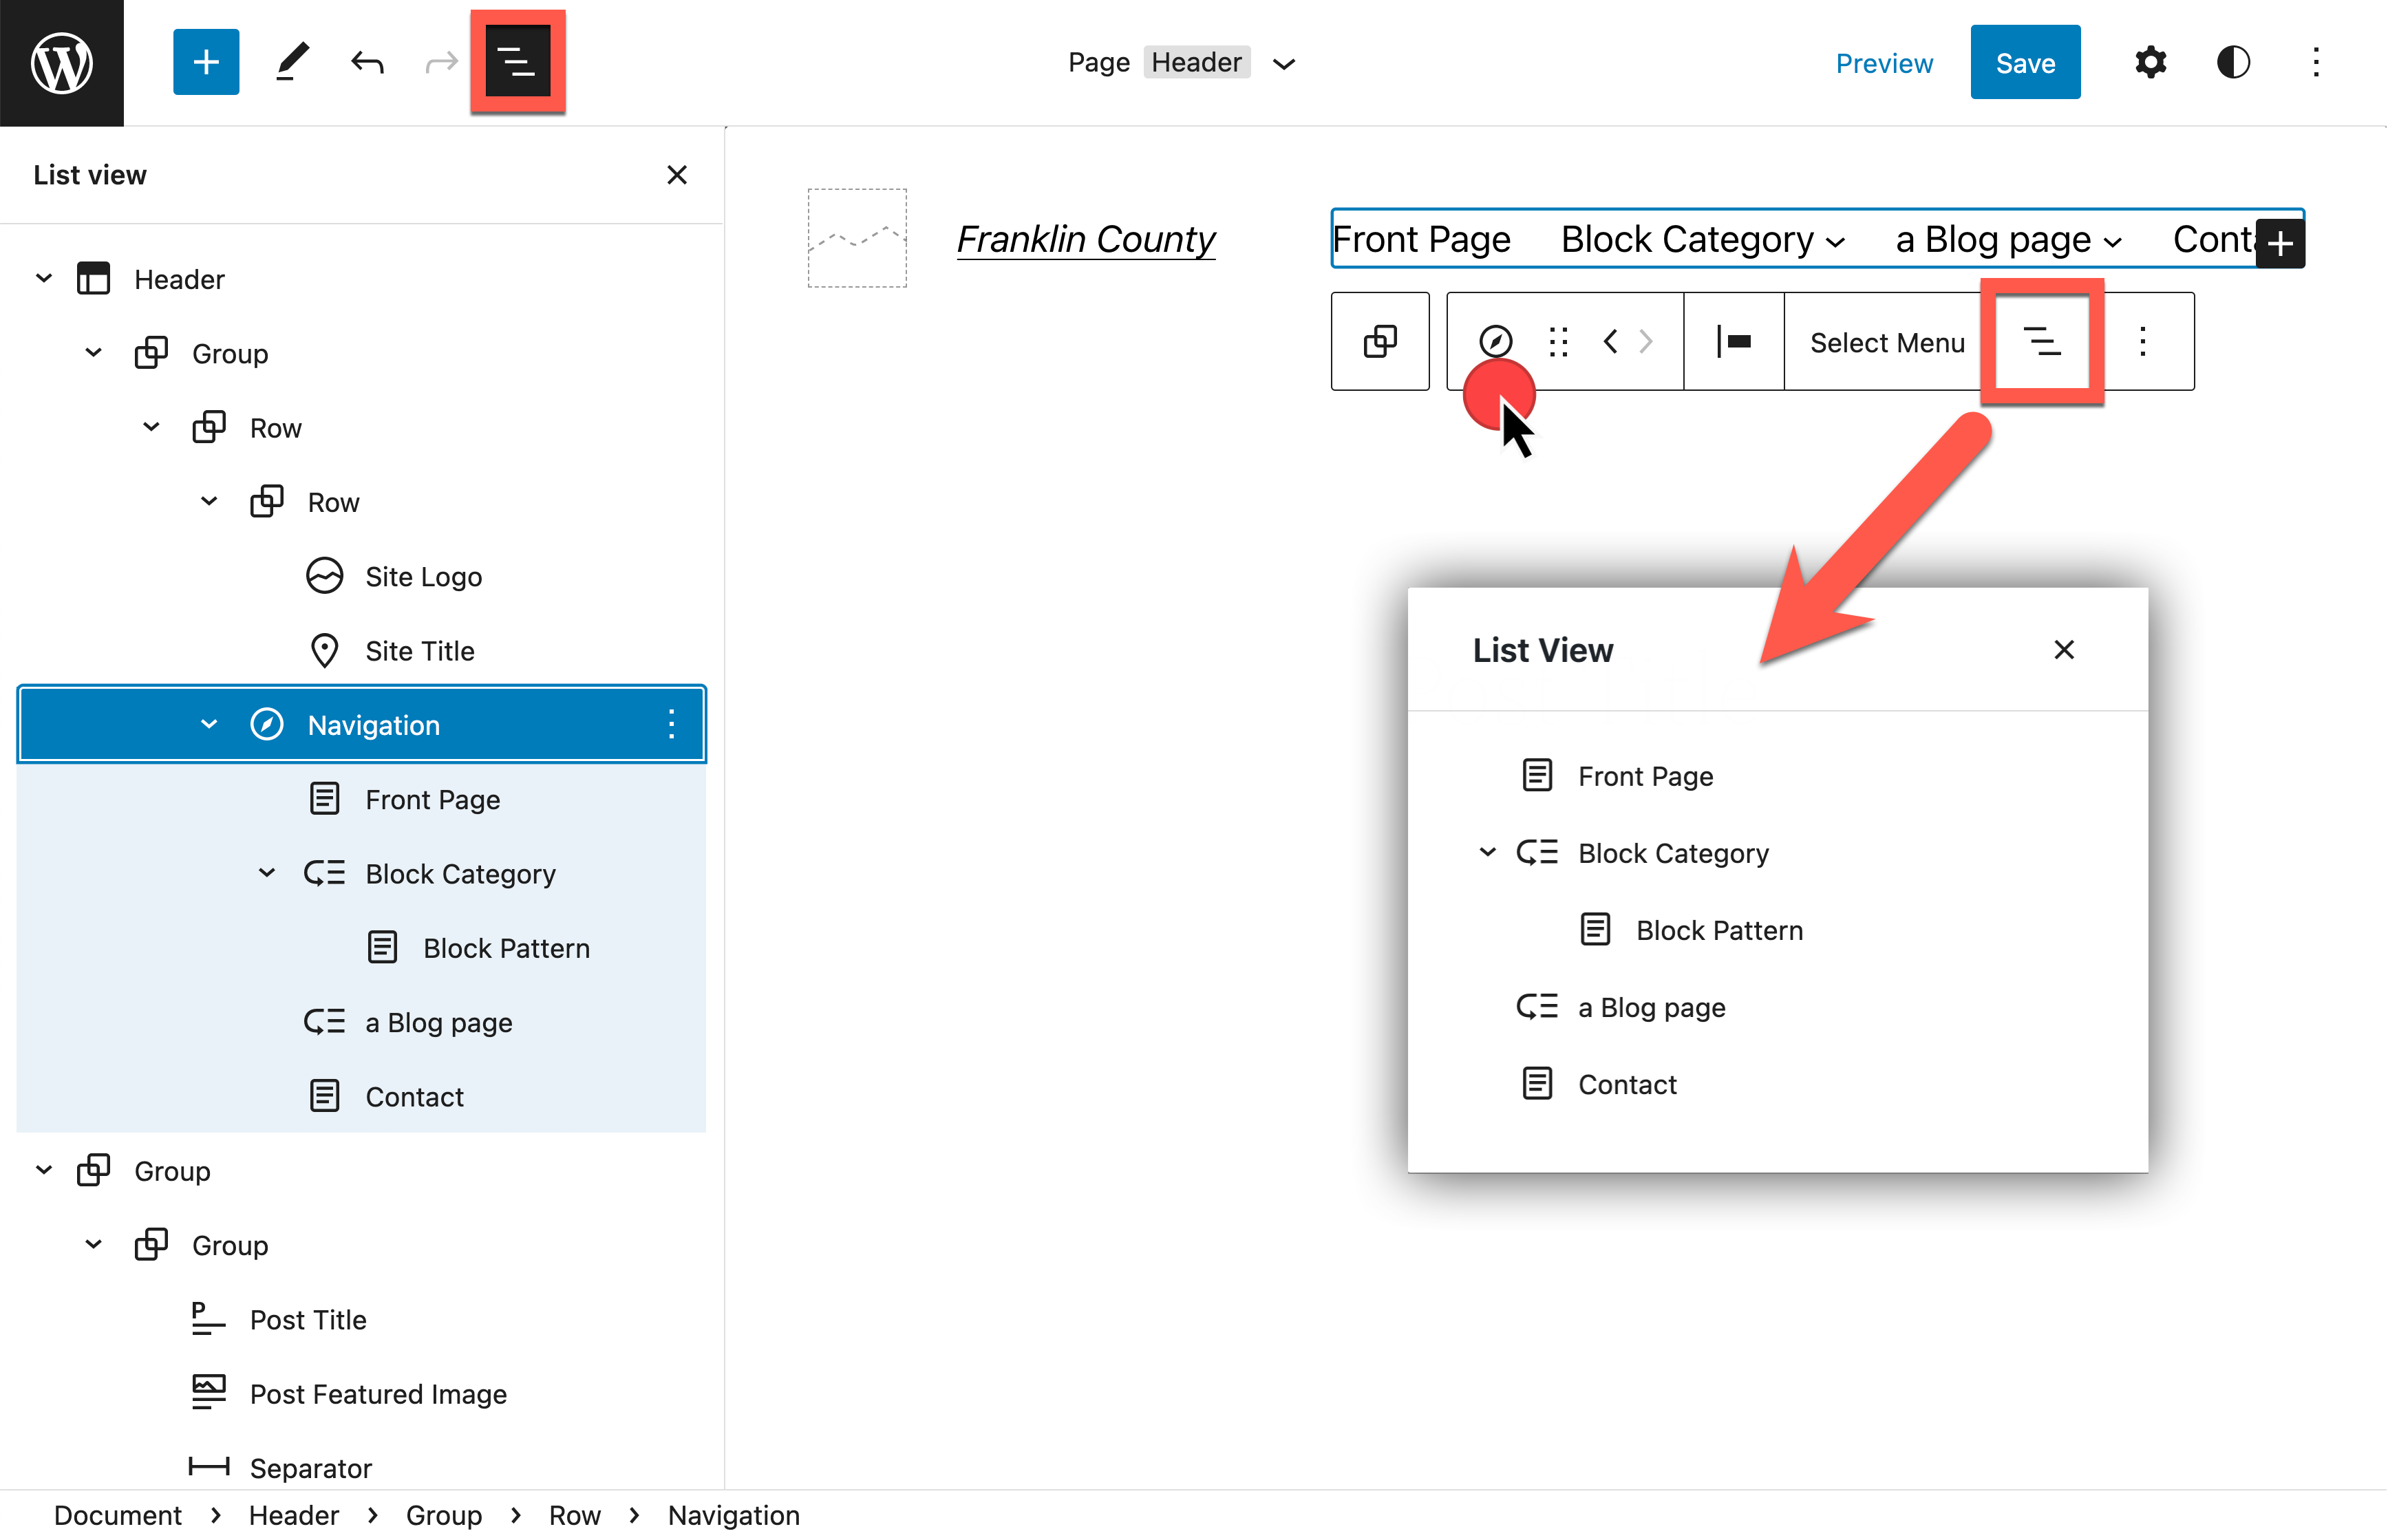
You can also use the List View to drag and drop items around. You have two List View options available.
- The List View is available for the entire Editor
- By selecting the Navigation menu in the toolbar, a List View option specifically for this Navigation block is available.
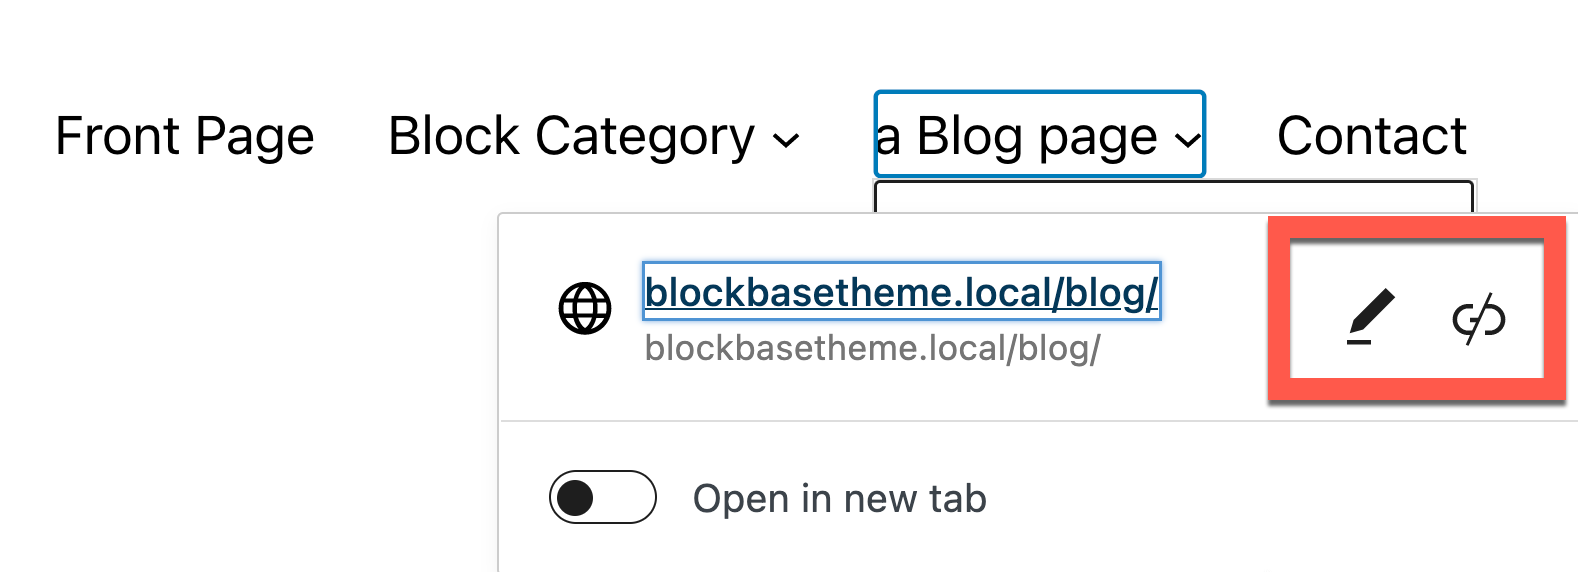
Changing Links and Titles
To change the name of a link, click on the item and type in the block to modify it.
To change the link destination, select the Link option in the block toolbar.

To change the name or link, select the options at right.
Blocks supported by the Navigation Block
There are some new possibilities with using the Navigation block compared to classic menus. Centering the site logo with additional spacing or providing a search box within the navigation is possible.
The following blocks are supported by the Navigation menu:
- Spacer block
- Custom link
- Post link
- Page link
- Category link
- Tag link
- Home link
- Page list
- Search
- Social Icons
- Site Logo
- Site Title
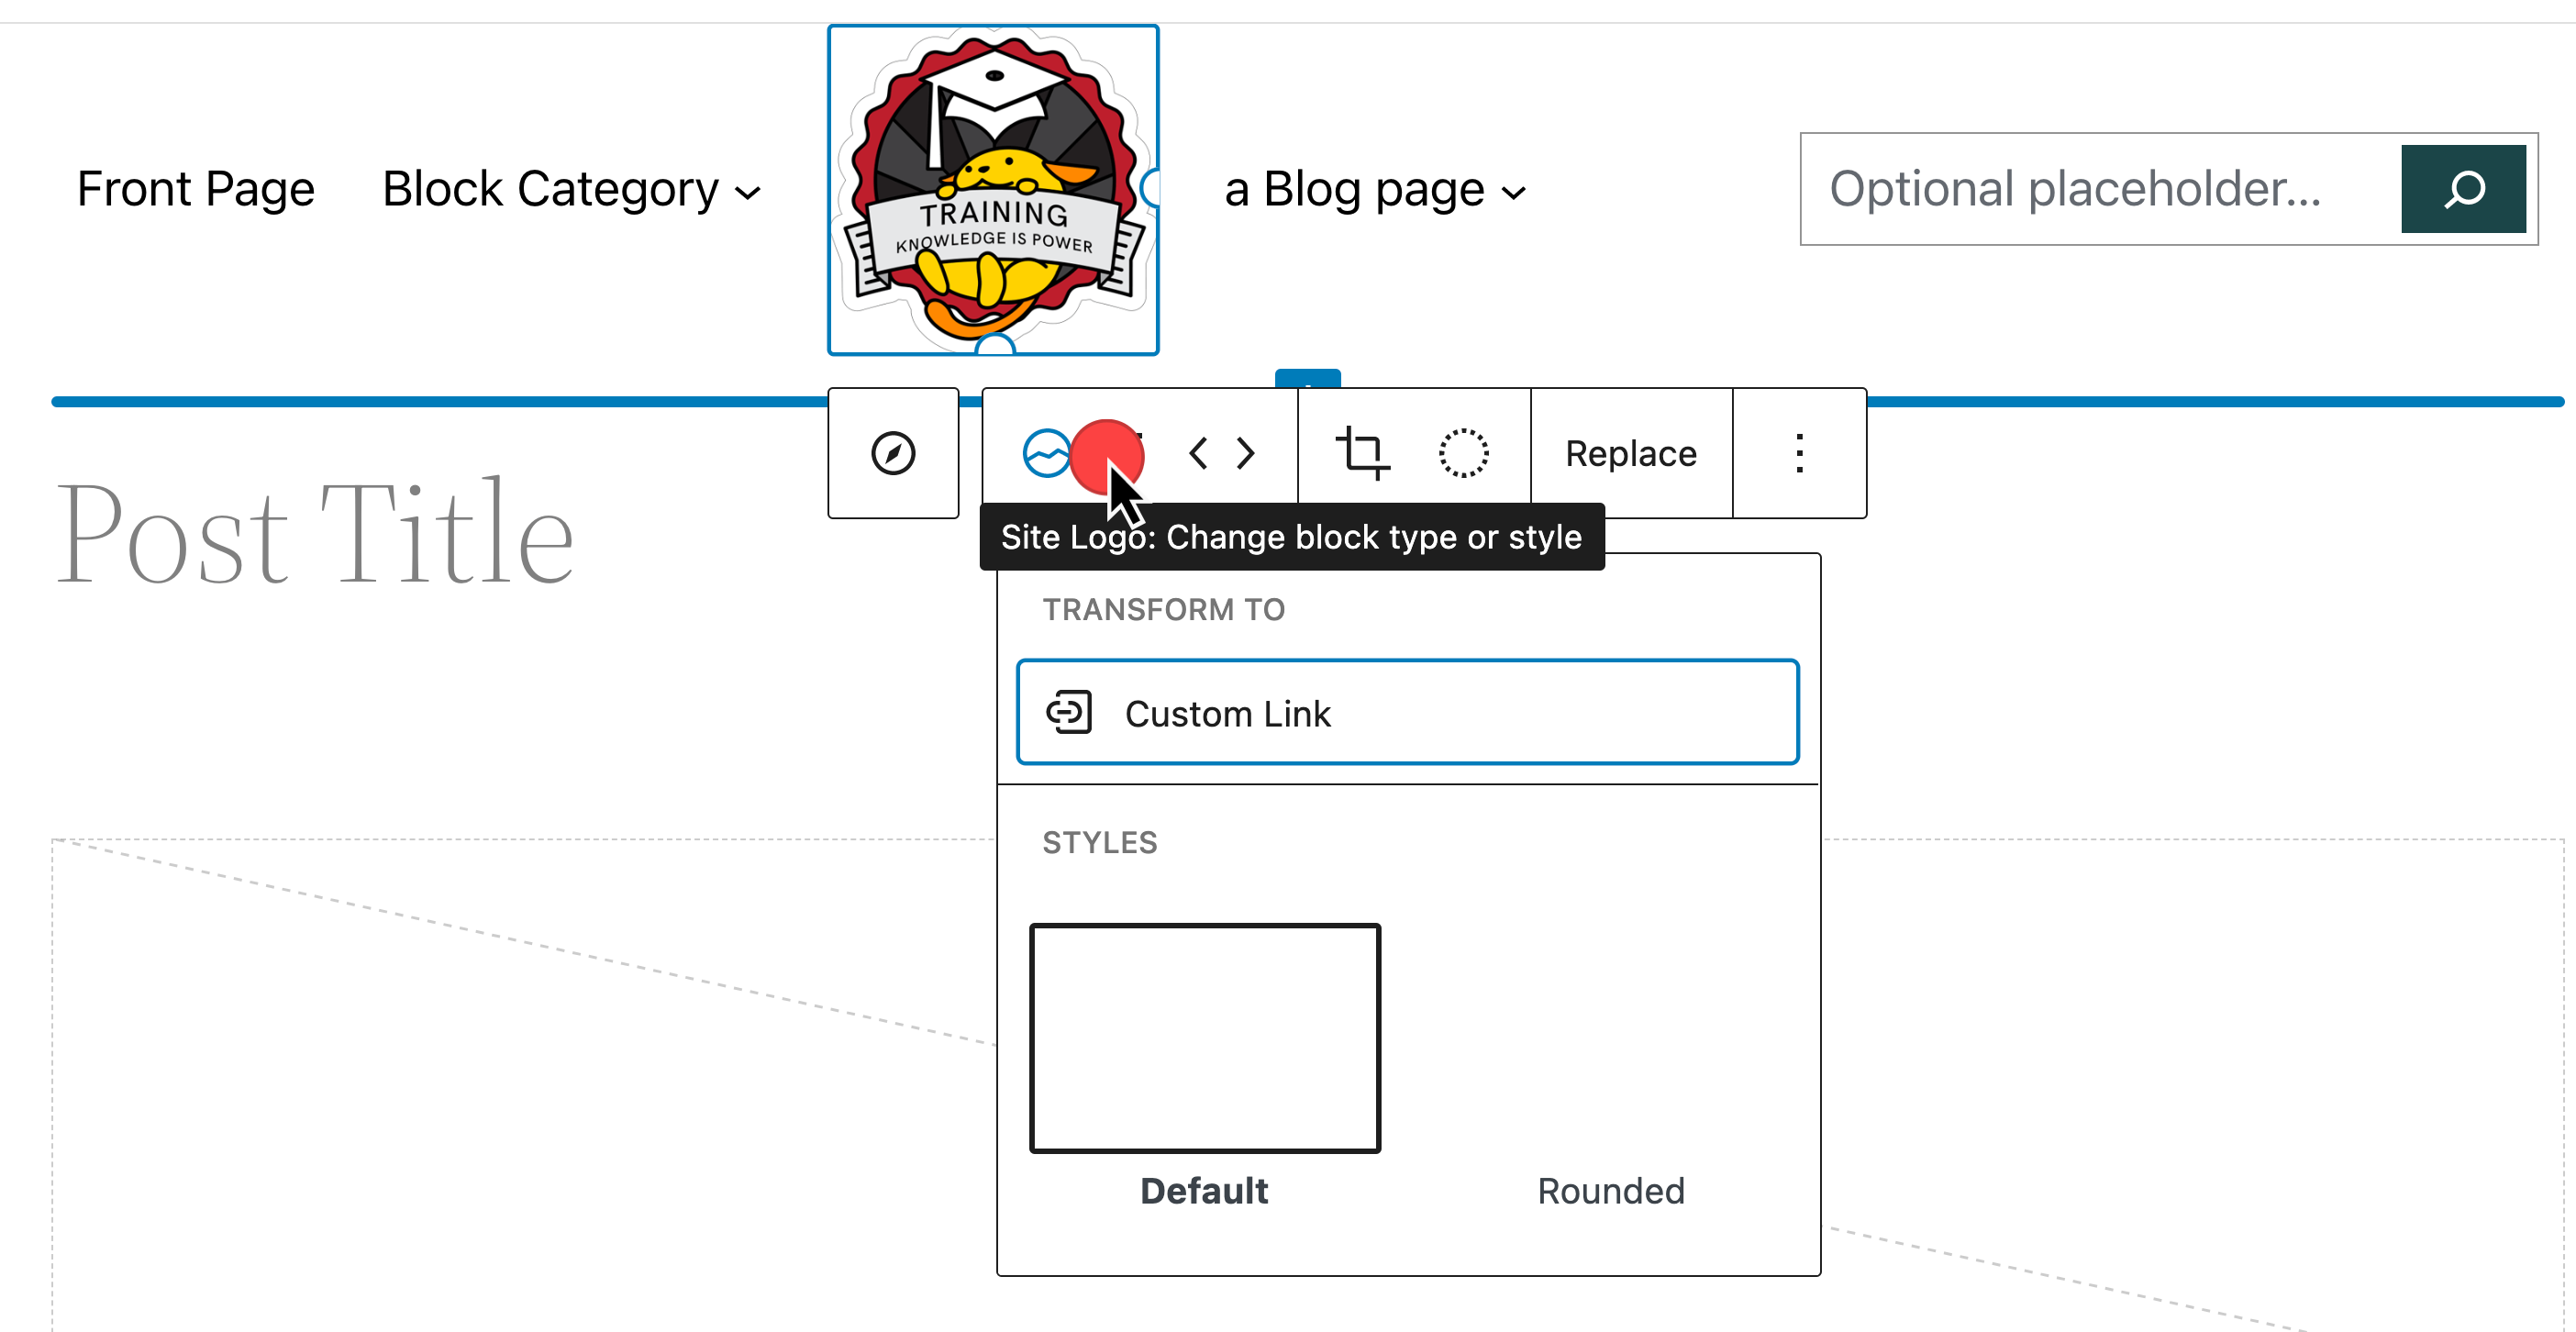
Transform Navigation Block Items
To transform the items in the Navigation block into a different item, select the transform options.
Manage Navigation Menu
When you have the Navigation Menu selected, within the Select Menu dropdown is Manage menus.

From here, you will see all of the Navigation Menu names.

If you edit one of these, you can rename and update the menu name.

Block Toolbar Items and Options
Each block presents different options to manage the block. The Navigation block includes several options.
Justification
To change the alignment of the Navigation block, you can select the Change items justification option from the block toolbar or use the Settings > Block panel.

Mobile Options
If you would like to modify when a mobile menu toggle is displayed, view the Block settings panel.
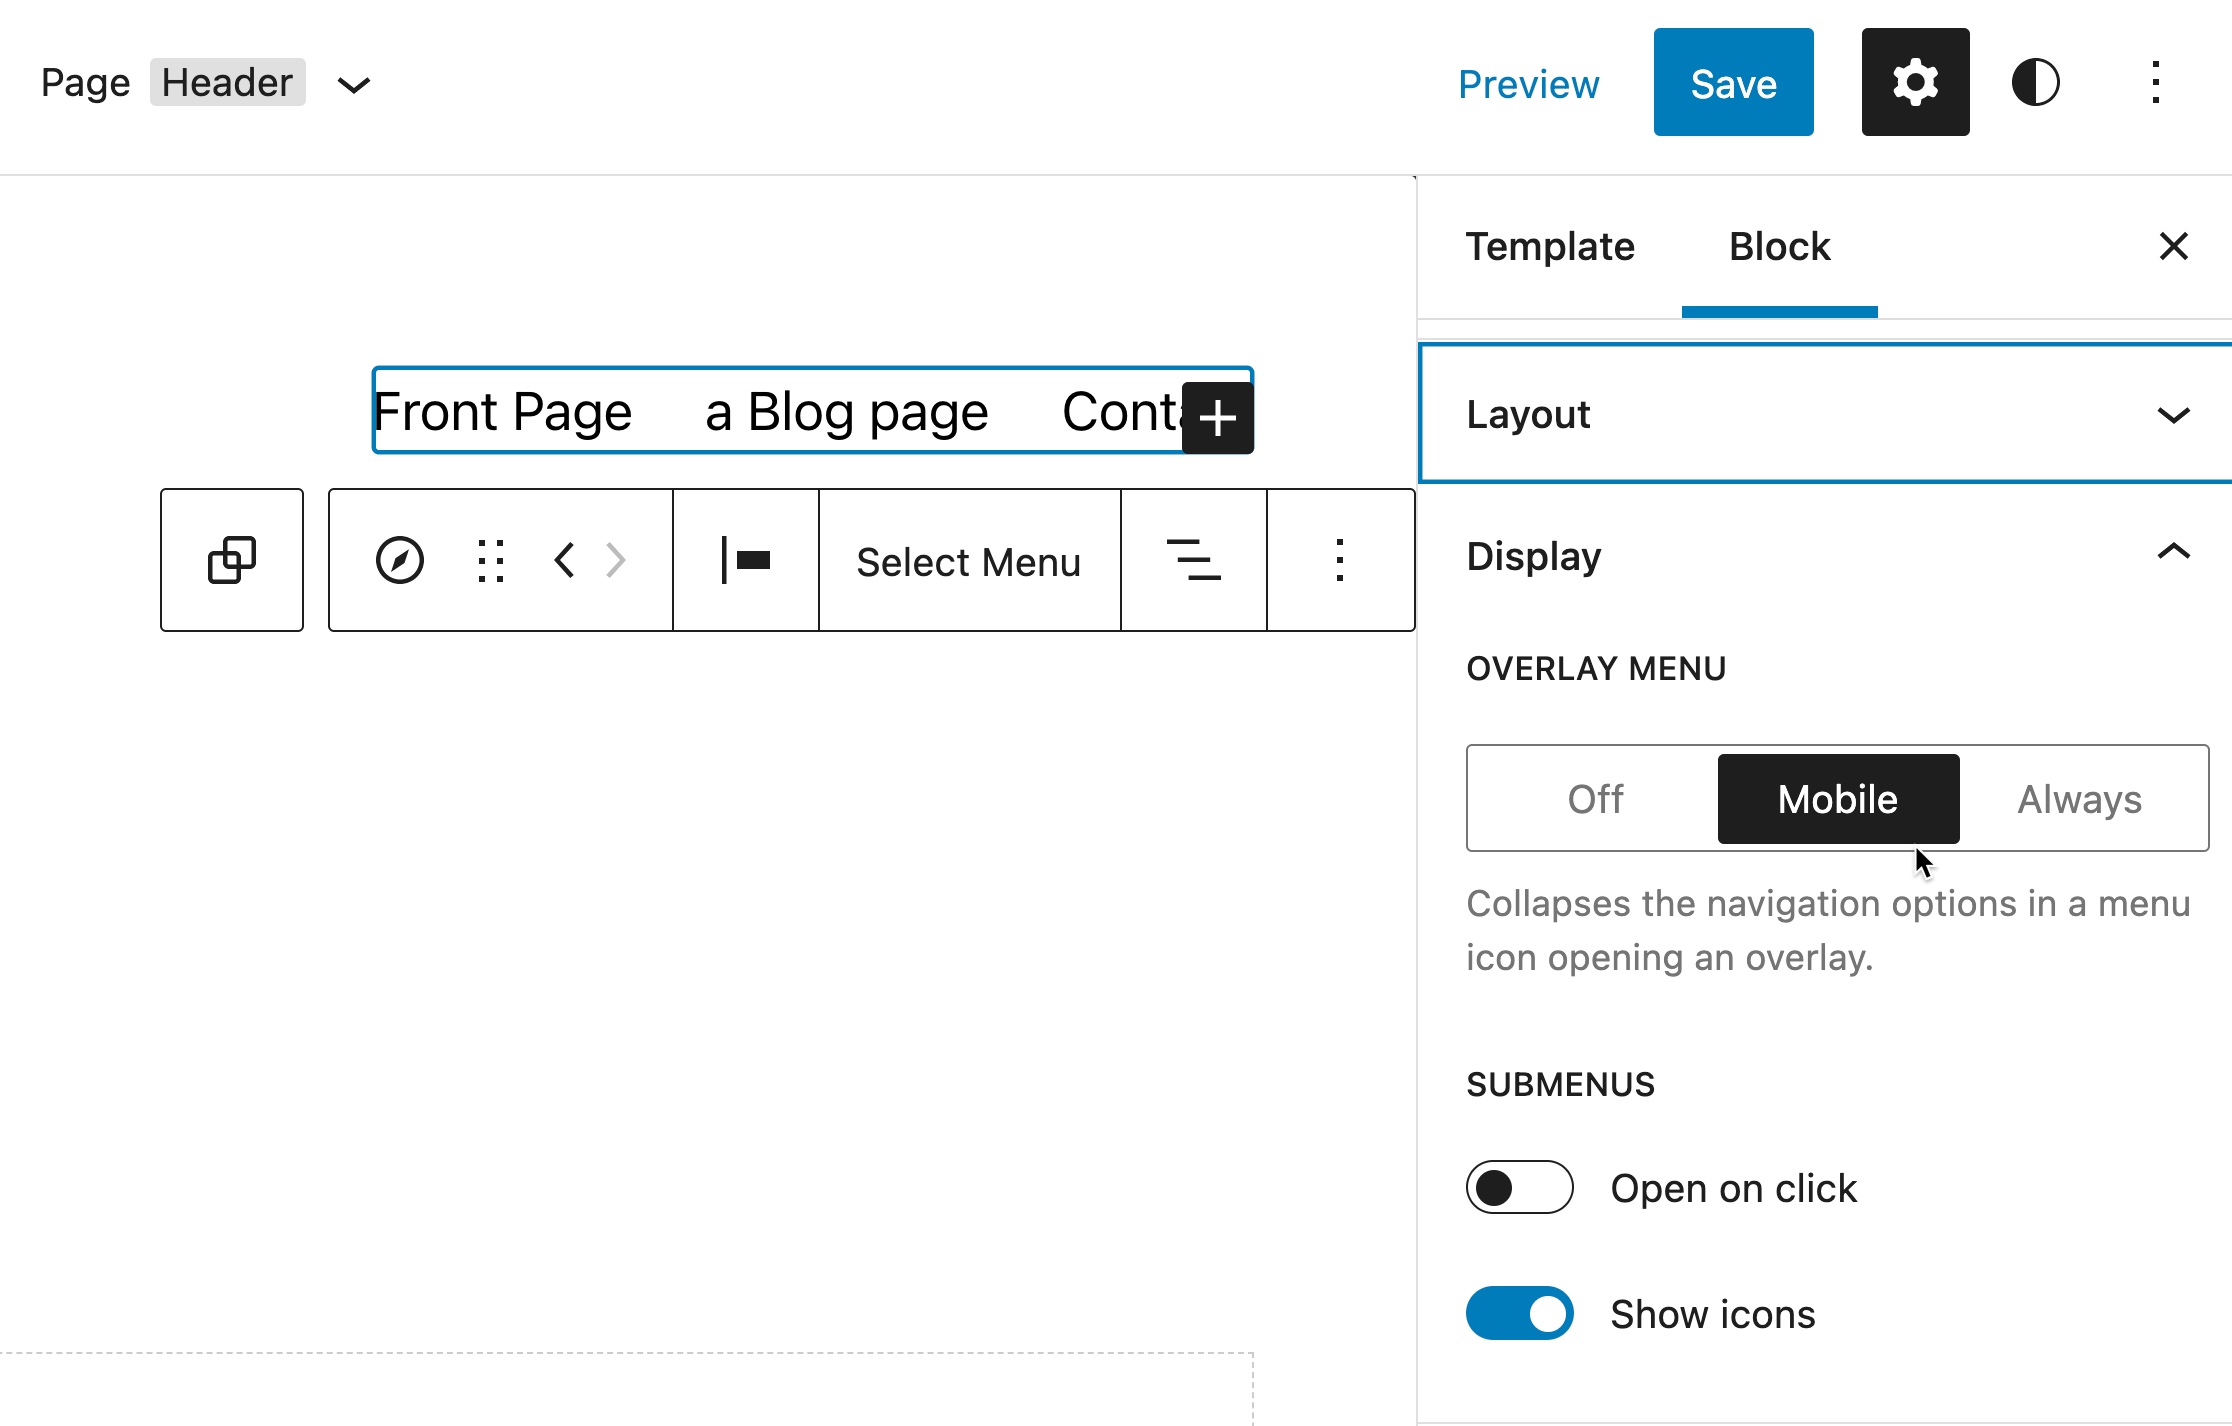
Additional Block Settings Options
If you would like to modify additional settings in your Navigation block, go to Settings > Block.

- Configure your Navigation block justification and orientation
- Toggle the overlay menu you would like to use and decide how submenus open
- Set the color of text, links, and background colors
- Adjust the size of fonts and block gap spacing
- Advanced settings such as naming the menu, creating an HTML anchor, or defining additional CSS classes
Lesson Wrap Up
Managing Navigation menus with blocks offers a visual way to build menus. We have created the main Navigation menu for your site. It is your turn now to create an additional menu.