Introduction to the Customizer (Classic and Hybrid Themes)
Below is a list of elements found in each learning module, and a brief description of each. When creating a new module, ensure that it contains each of these elements.
In this lesson, you will learn that the Theme Customizer provides a centralized place to change options that control the look of your WordPress site. This lesson covers how to locate and use the Customizer and the options that it includes. Many themes have more complex settings, but in this instance we are using the default theme Twenty Sixteen and configuring the default settings for WordPress 5.3 and earlier. Please note that the Customizer is used with classic or hybrid themes.
Objectives
After completing this lesson, you will be able to:
- Locate the Customizer in the WordPress Dashboard.
- Demonstrate how to open and close the Customizer.
- Show how to update items using the Customizer, such as site colors or menus.
- Use the Customizer to save changes.
- Identify and modify theme settings
Prerequisite Skills
Participants will get the most from this lesson if they have familiarity with:
- The WordPress Dashboard.
- Are able to install a theme.
- Familiarity with what a theme does
- Familiarity with WordPress
Assets
WordPress default installation with included default themes.
Screening Questions
- Do you publish a WordPress site at this moment? (Preferred answer: yes)
- Do you have a selected theme that you would like to customize? (Preferred answer: yes)
- Are you familiar with the WordPress Dashboard? (Preferred answer: yes)
Teacher Notes
- Performing a live demo and/or having students access their Customizer during the lesson will be helpful in their understanding of the Customizer’s capabilities
- Different themes will impact the Customizer’s capabilities. Reminding students that this may be the case will be helpful at the beginning of this lesson.
- Either a live or local install of WordPress should work fine for this lesson.
Hands-on Walkthrough
Getting into the Appearance Area of the Menu
Go to Appearance > Themes and choose the Twenty Sixteen theme.

Click on Customize or go to Appearance > Customize in the menu

Now you are ready to modify the theme
Modify Site Identity
Your first option, under the choice of theme is Site Identity.
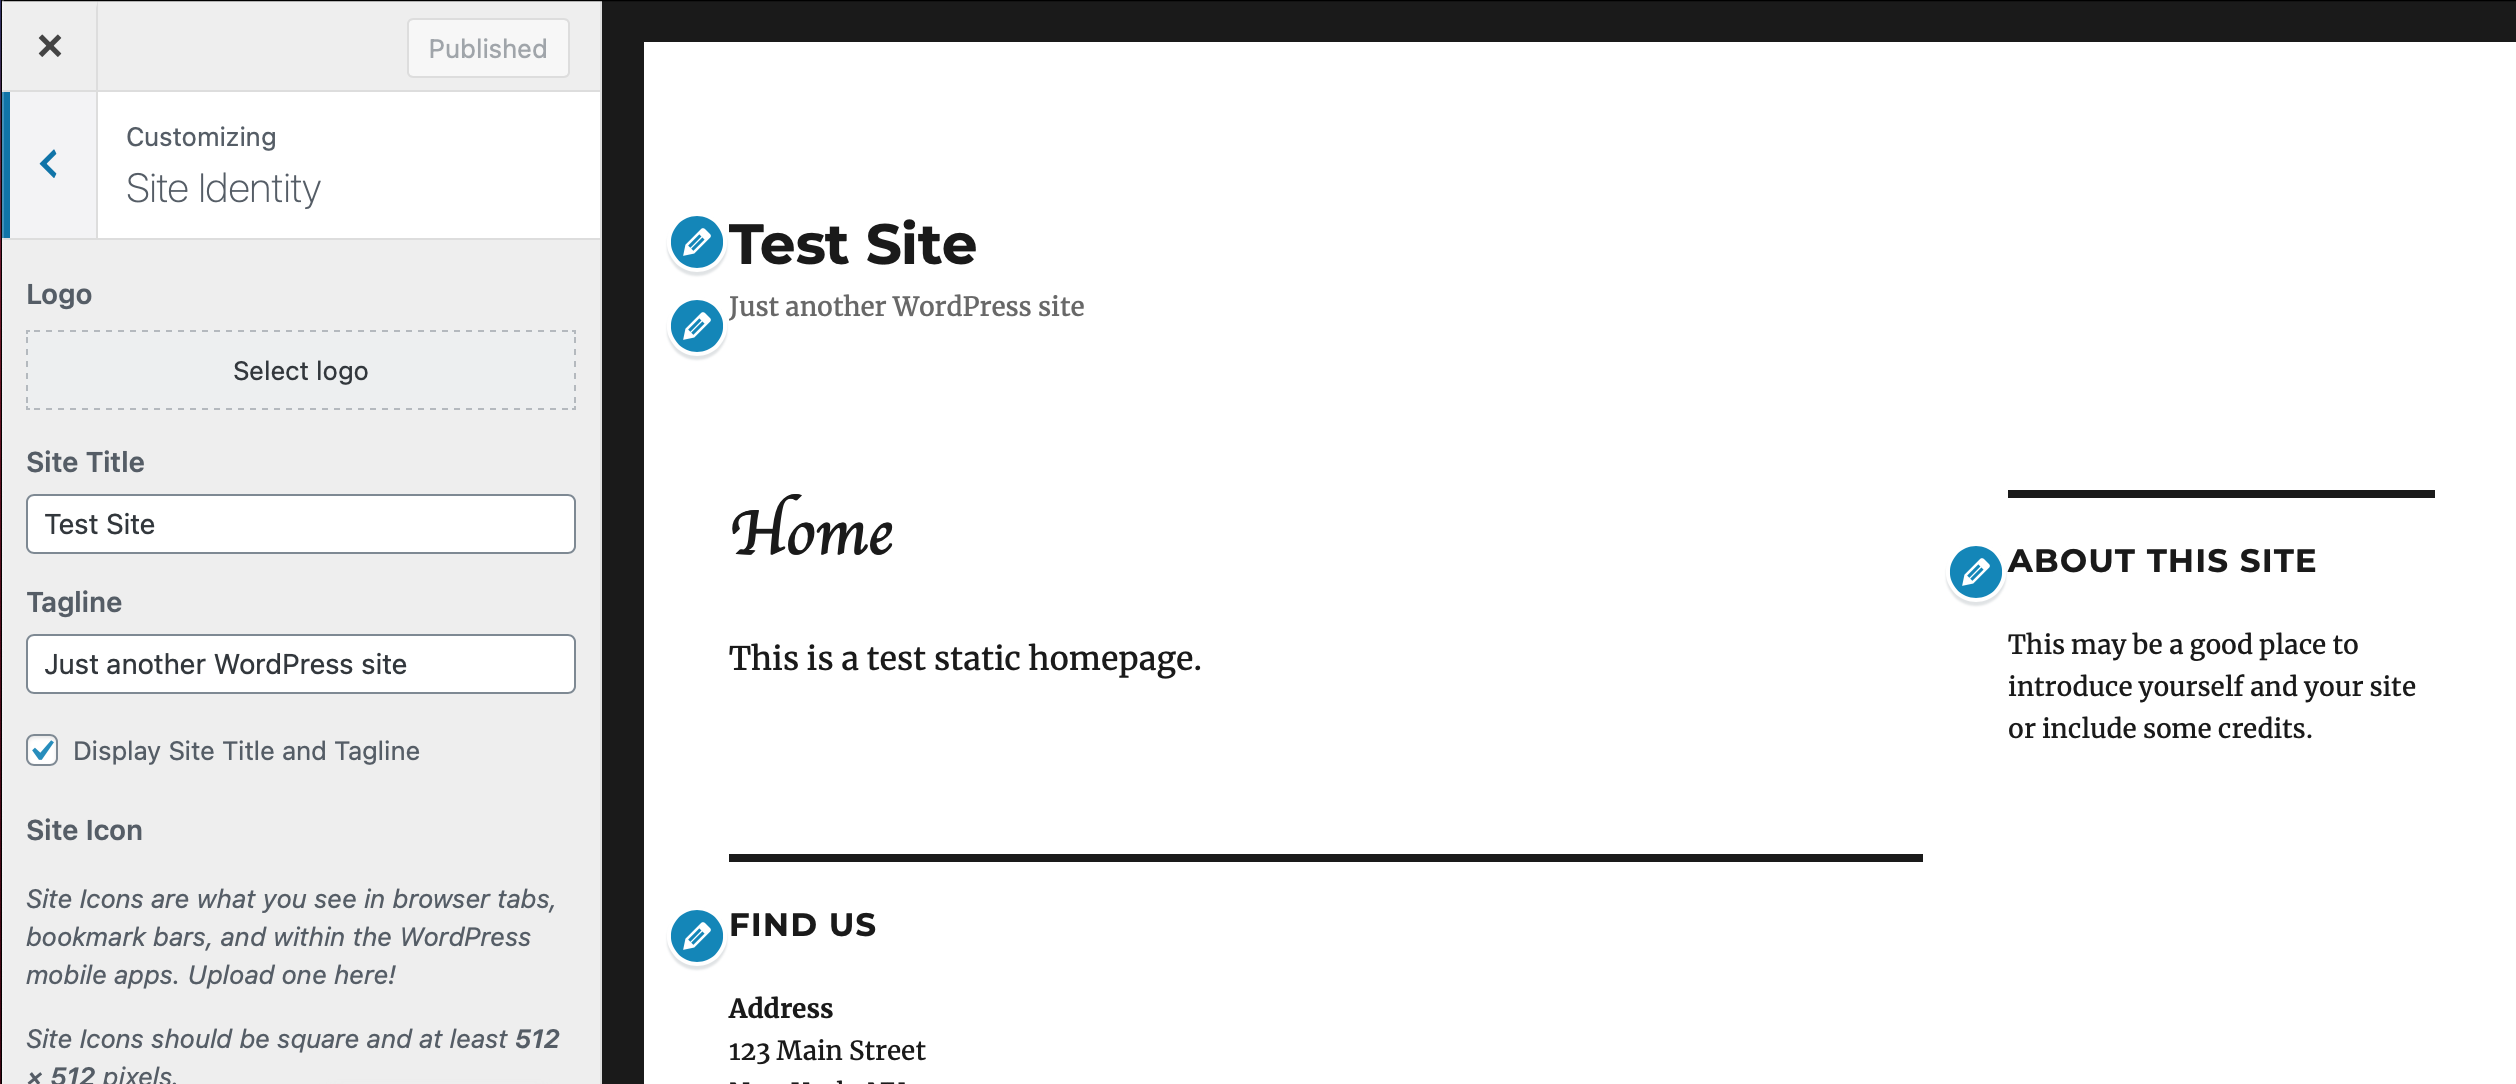
The Site Title and Tagline are also located in the Settings > General area on the main menu on the left.
This is the place where you can upload your logo and title your site.
Upload files from your computer, then select the logo:

Once you have chosen the logo, change the title and tagline on your site and decide if you want them to display or not.
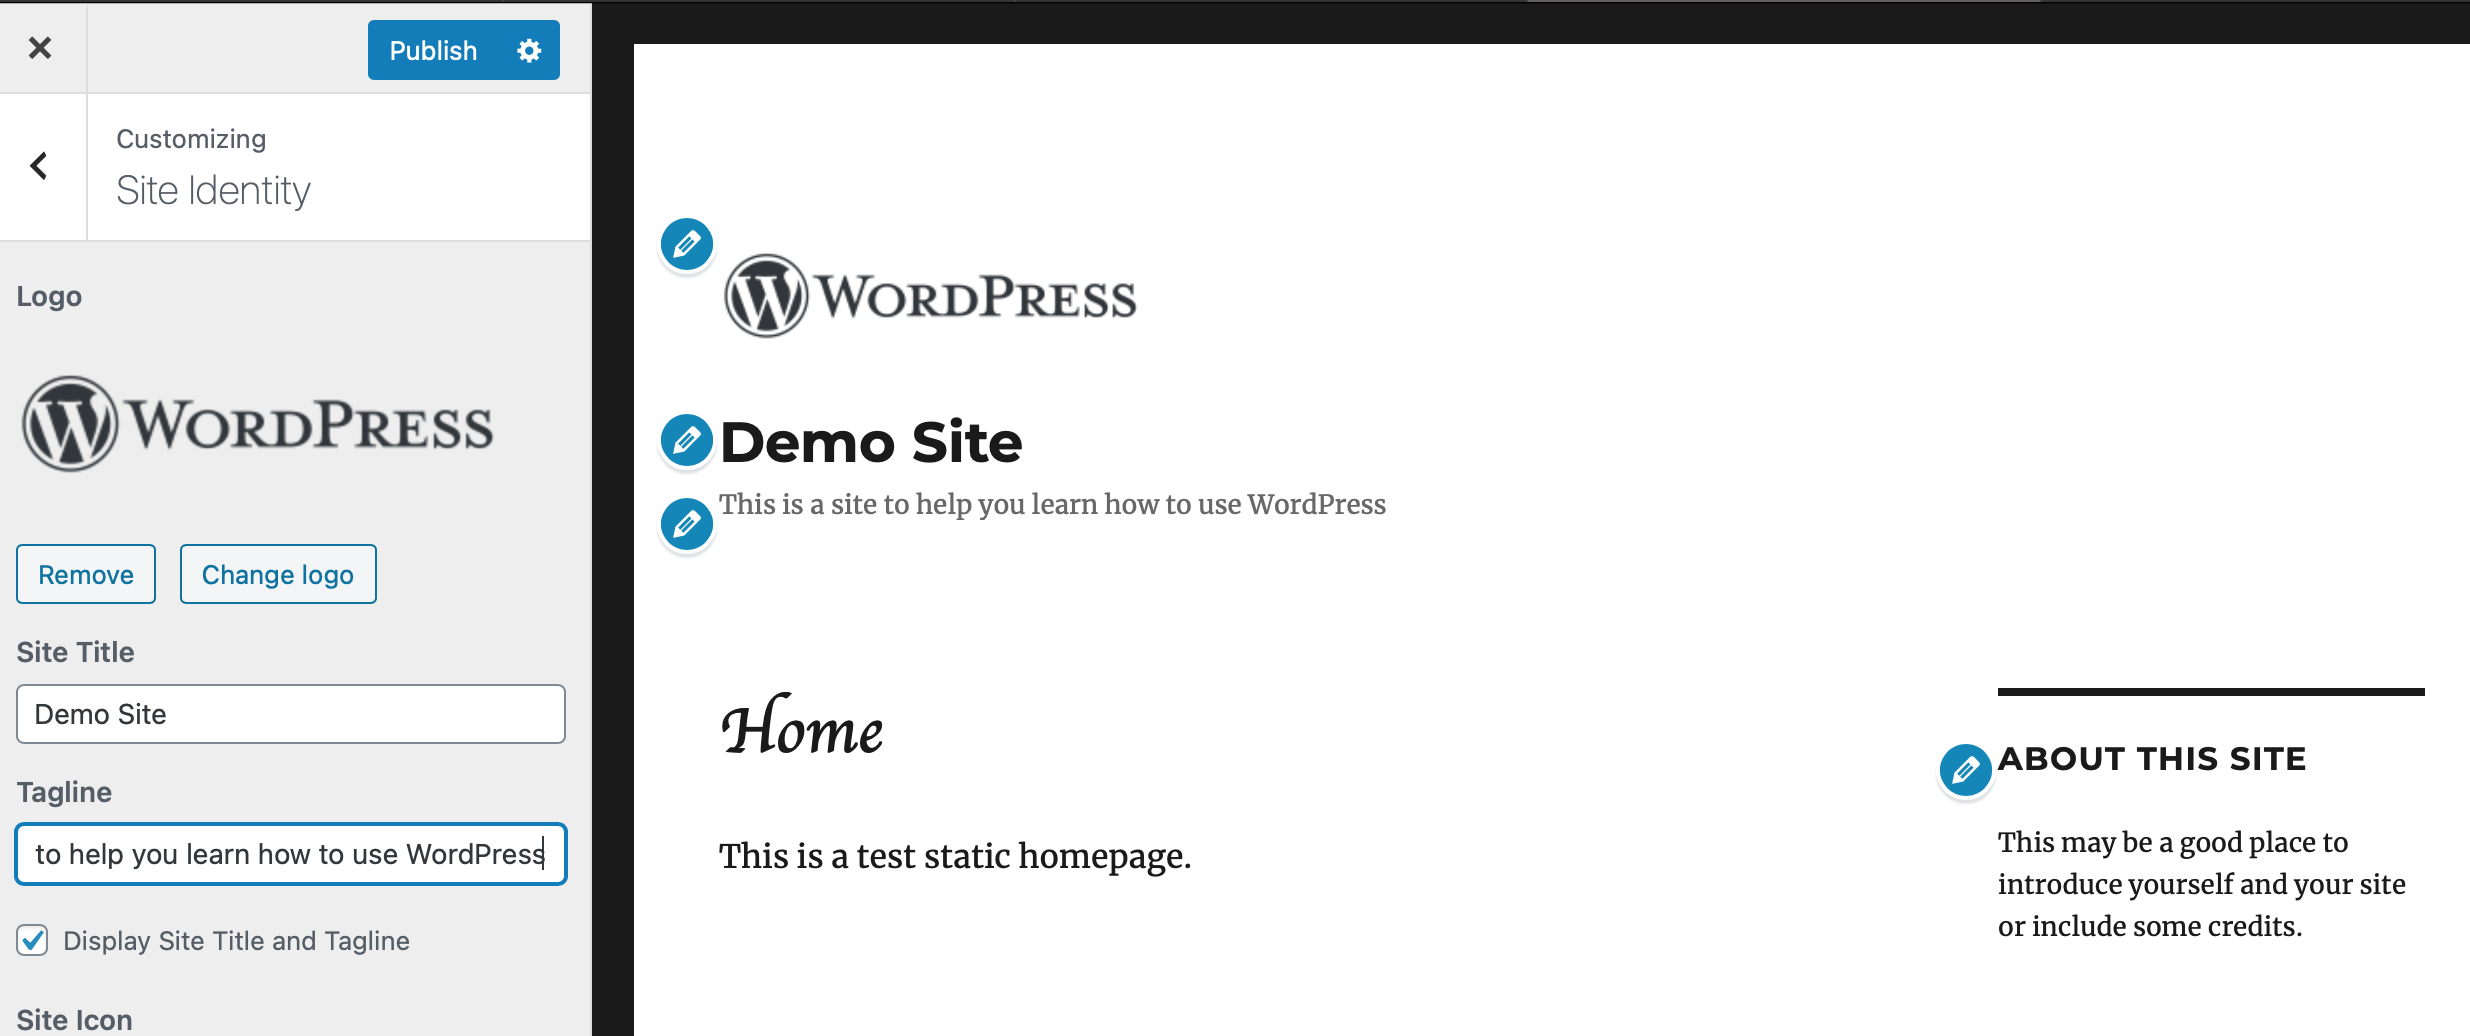
You will have the option to crop your image, for this exercise, we will “Skip Cropping.” You will now be able to change the Site Title and Tagline by typing into the text boxes.
Next, you can upload a favicon and site icon, making sure your image is 512px square. Click “Select Image” and follow the add media dialog sequence, like you did for the logo above.

Once it is uploaded, you can save the Site Identity section of the customizations.

Then click < back to the main customization navigation

Customizing Color
Chose the Colors menu item.
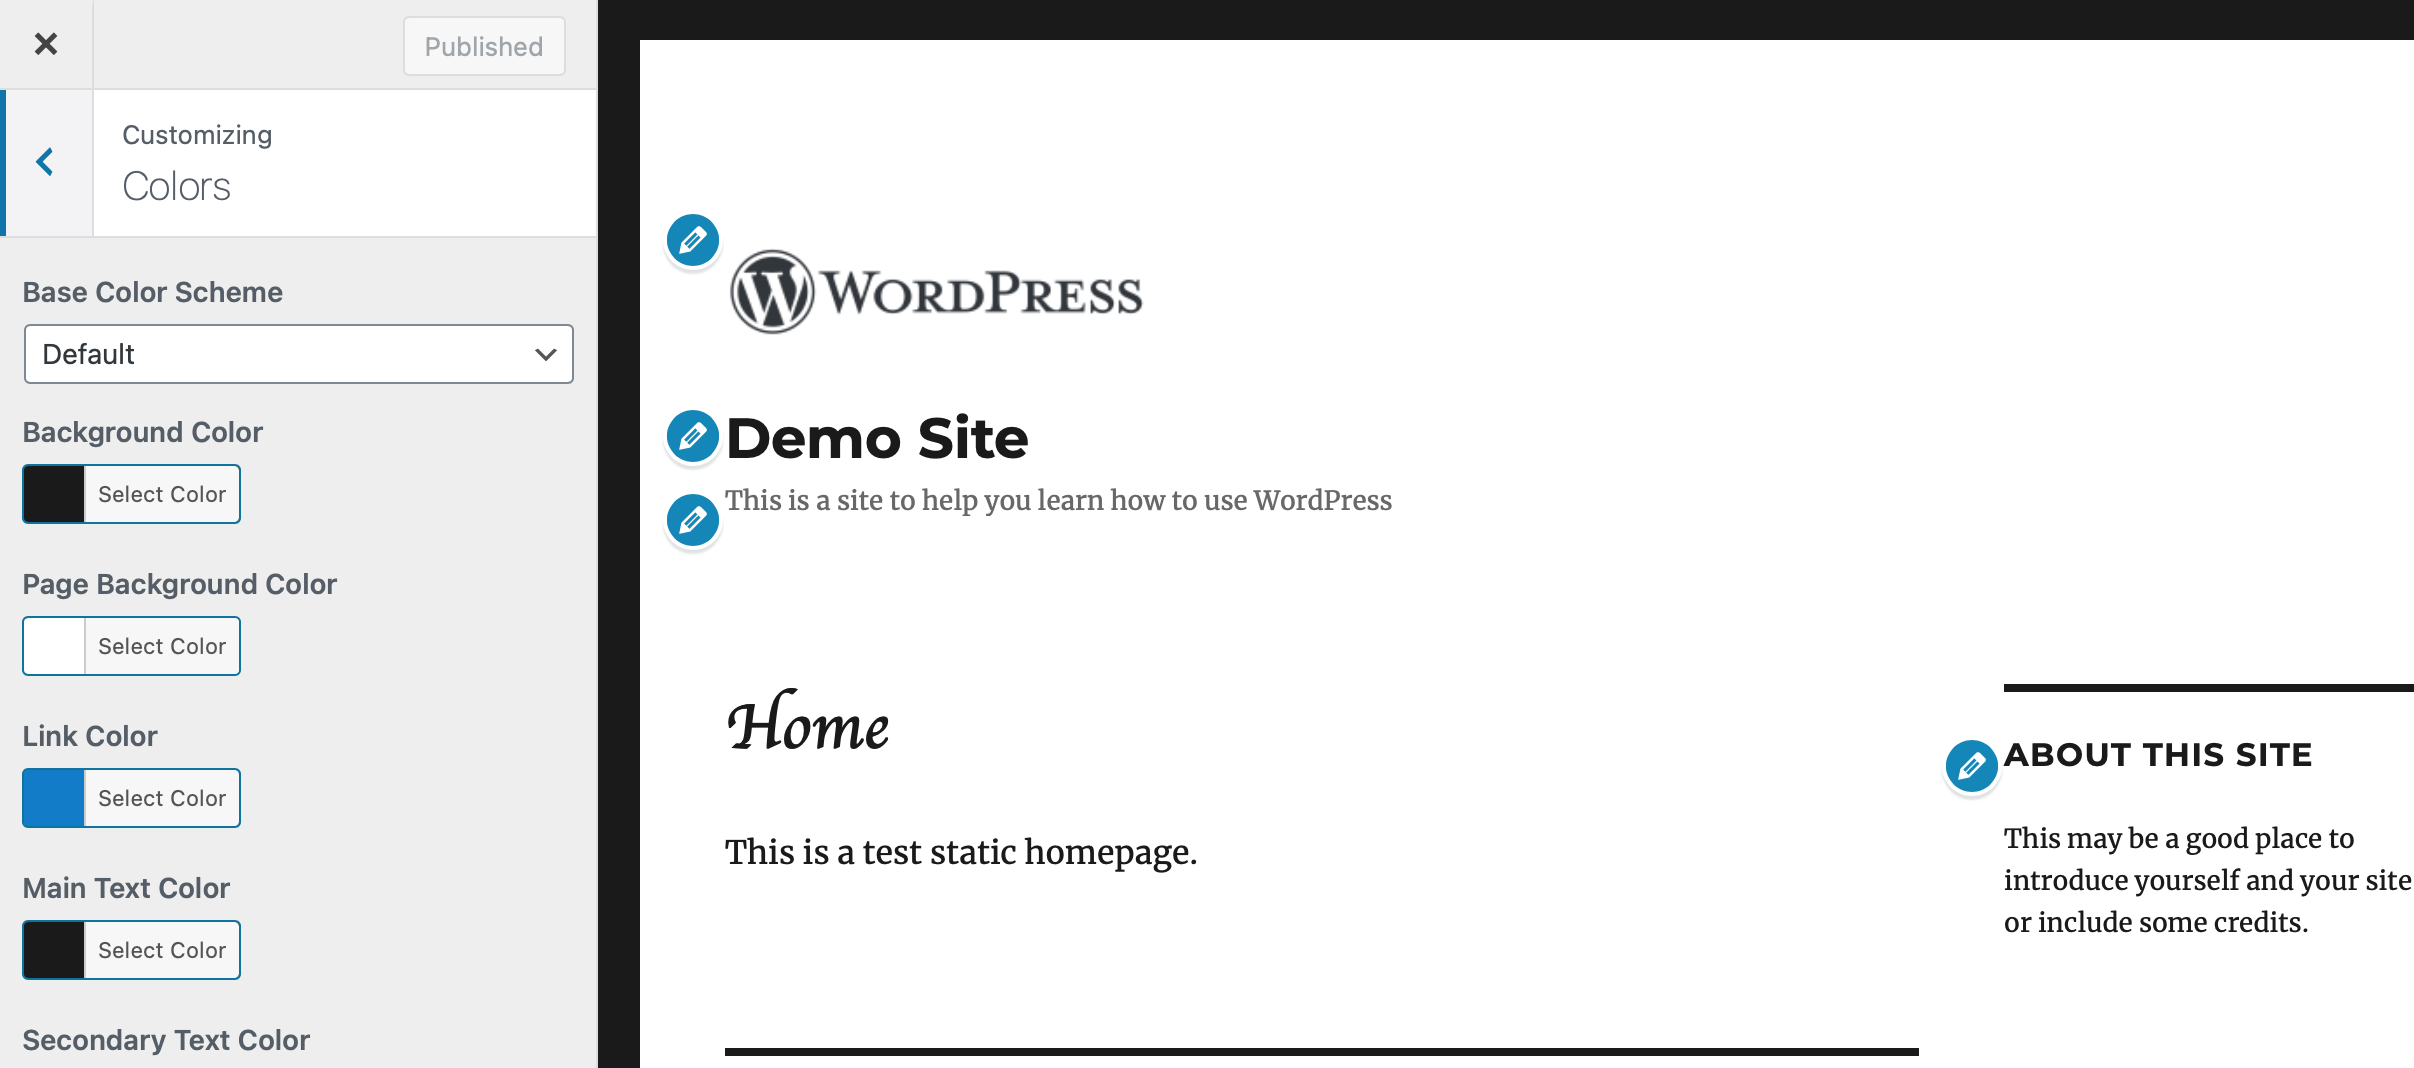
Change Base Color Scheme or any of the individual colors, then Save & Publish. Leave the Customizing Colors panel by clicking the arrow back.

Background Image
Choose the Background Image Menu item. When the dialog opens, the only option is to Select the background image… do so!
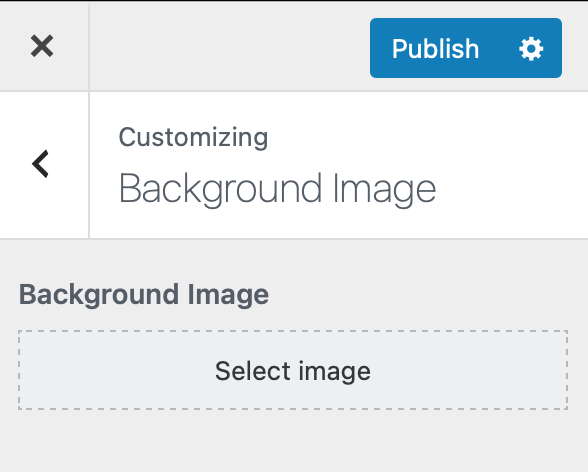
Follow the Select Image dialog and upload an image.
Once the image is uploaded, there are lots of options.
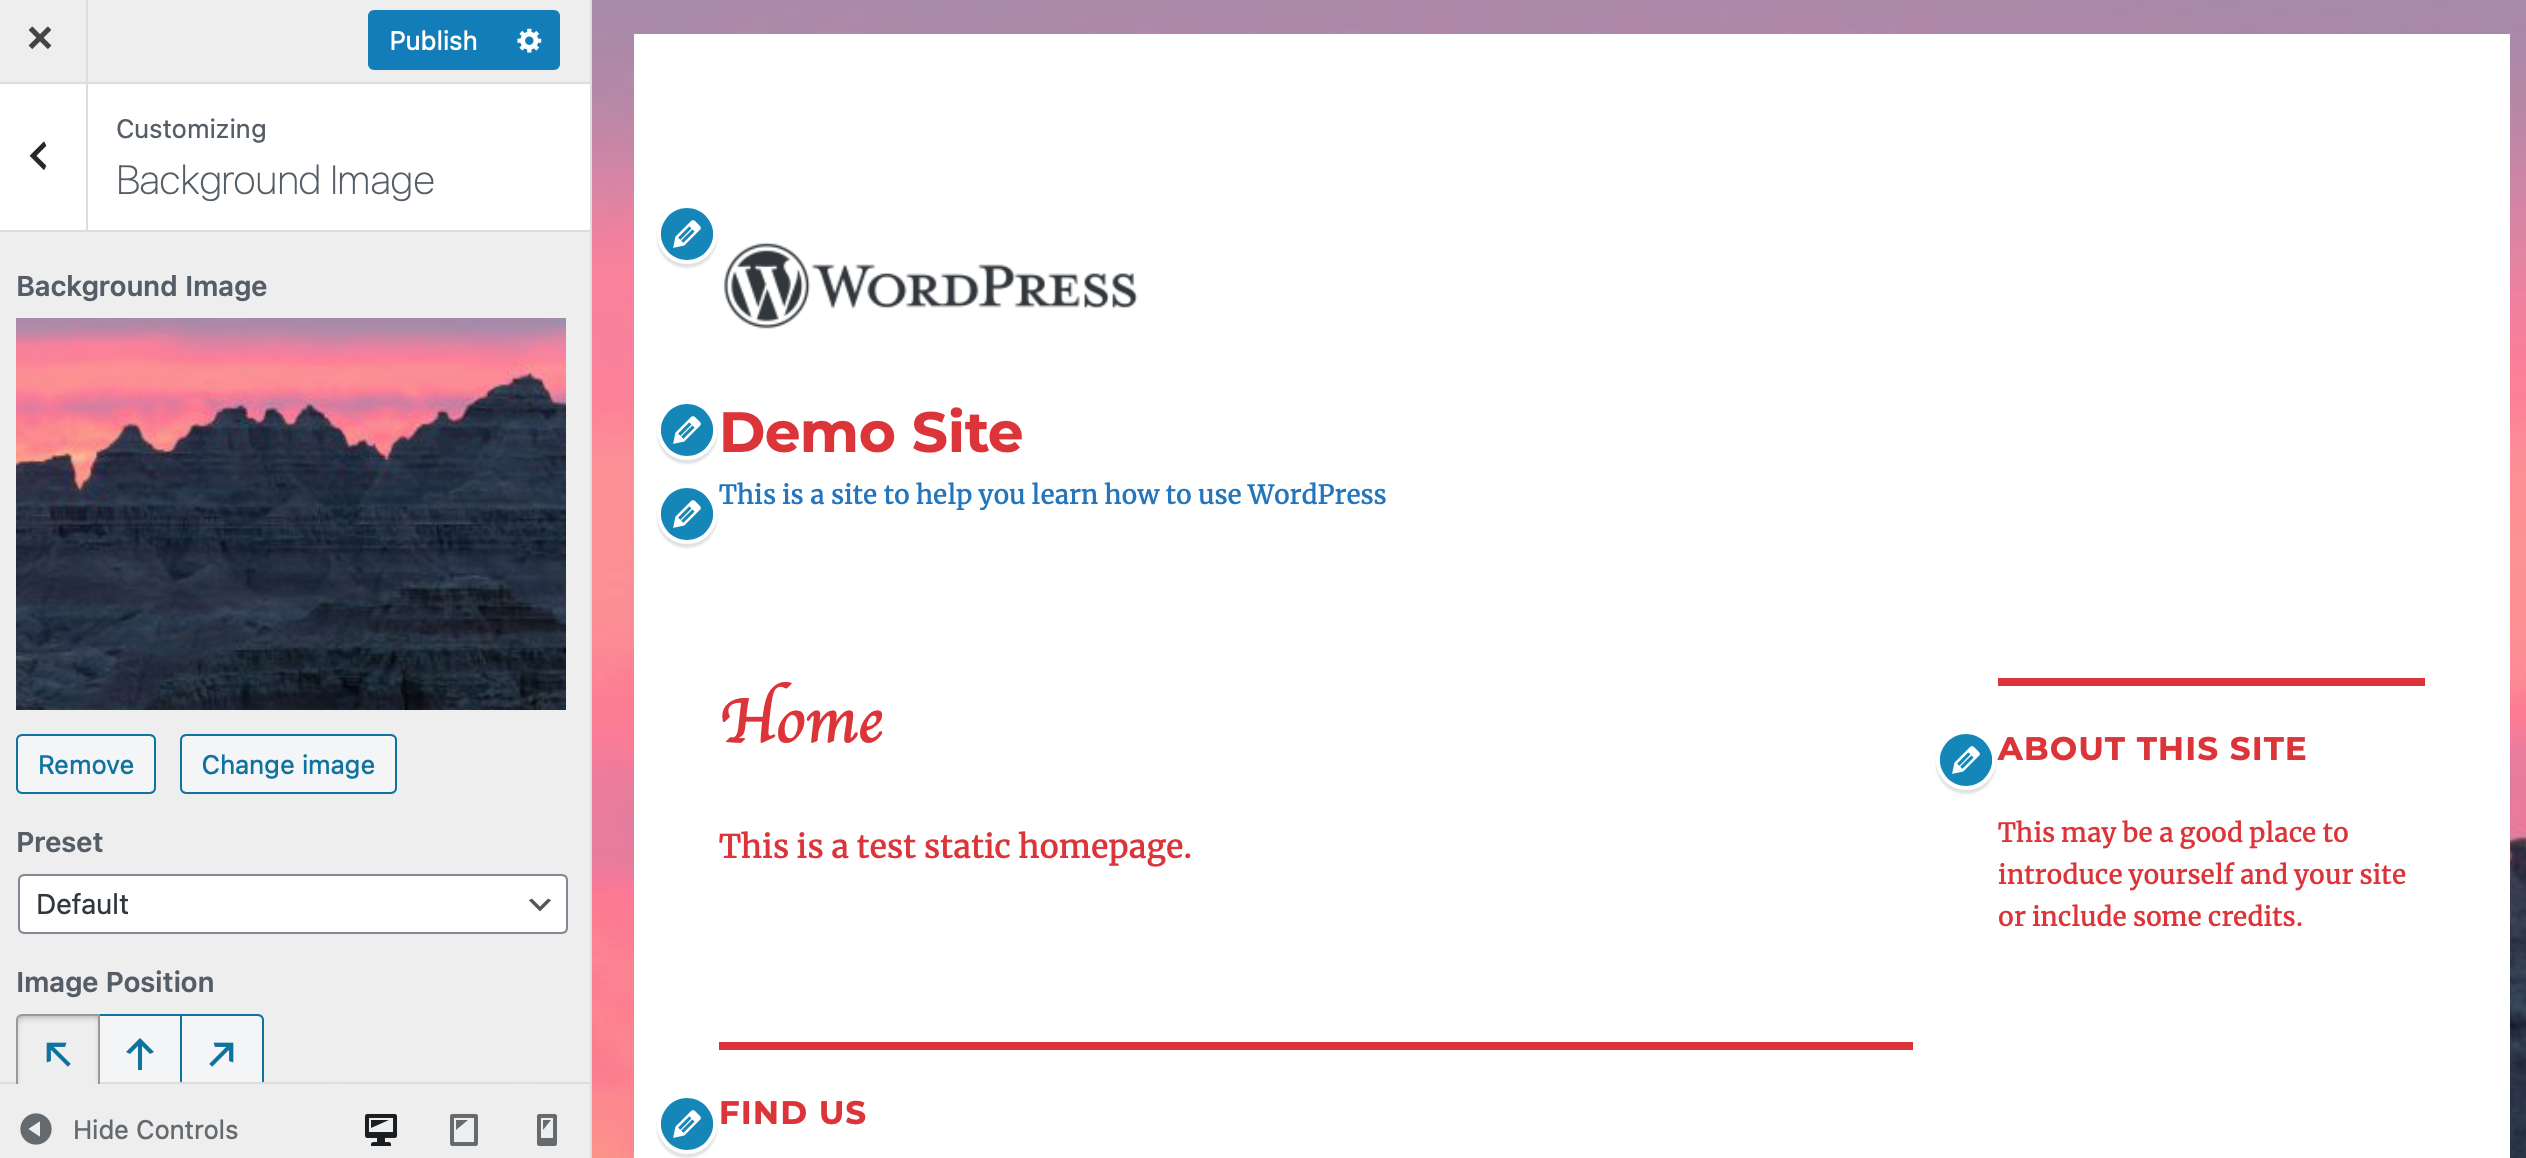
Background Repeat determines how the image repeats on the background. If you select No Repeat, the image will display one time. Depending on it’s size, it will only show at the top left of the background.
Tiled, the image will repeat over and over filling the space that is the background.
Tiled Horizontally, the image will repeat left to right. Tiled Vertically, the image will repeat top to bottom.
Background Position determines if the image is aligned Left, Right or Center.
In most cases, the background image is tiled, so that it covers the all of the background, but that depends on your preference.
Background Attachment determines whether the background stays fixed or if it scrolls with the body copy.
Experiment with the settings and decide what works for you.
When you are done, click Save & Publish, then go back to the main Customization Menu.
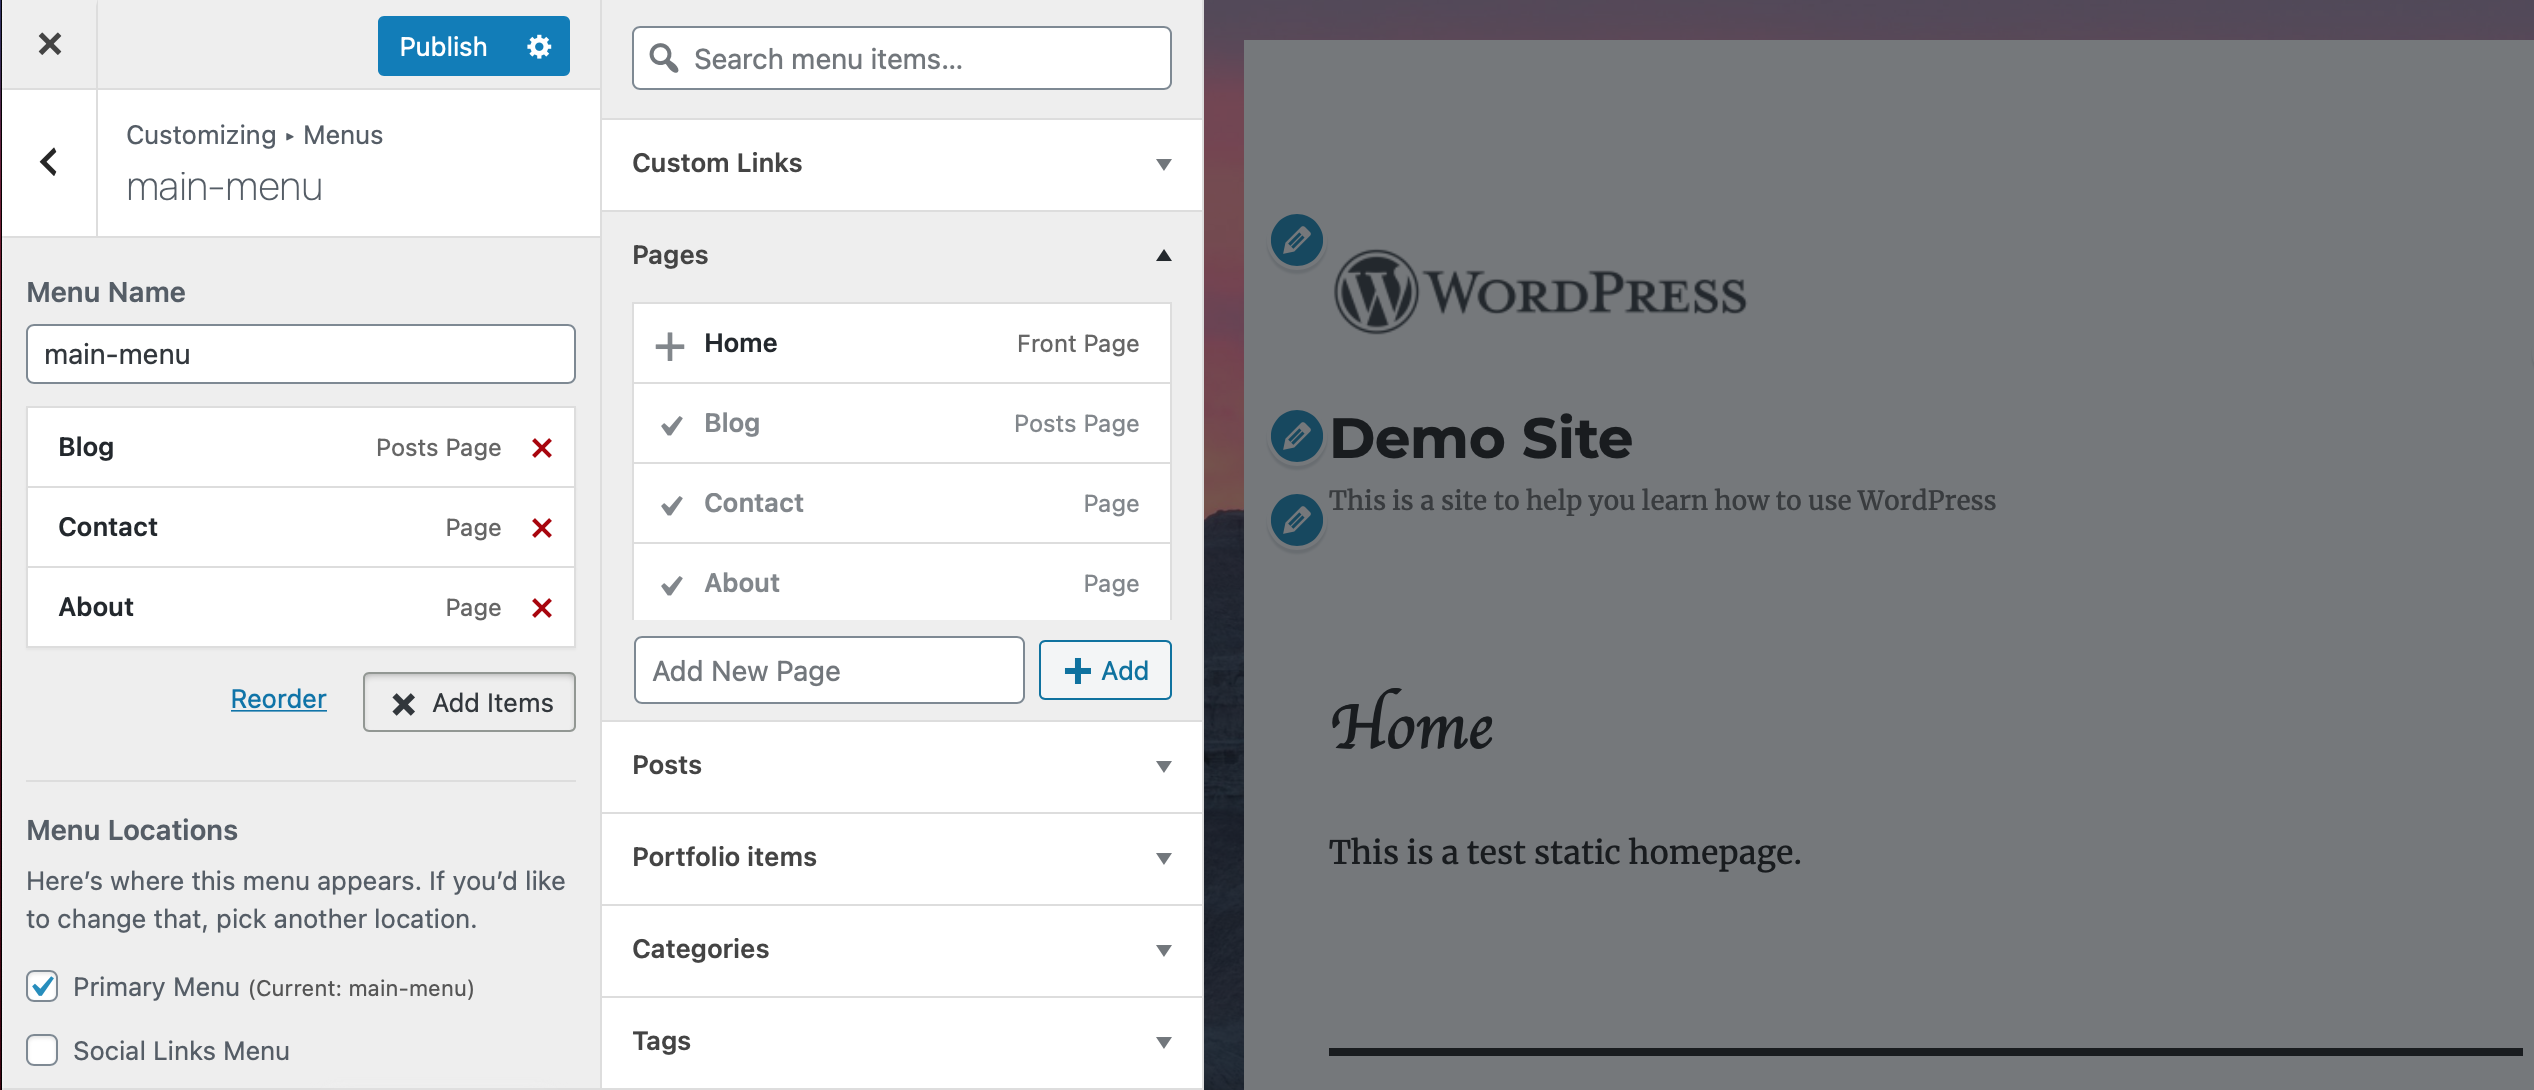
Editing Menus
Click on the Menu and that will bring you to the dialog that gives you the opportunity to chose menus.
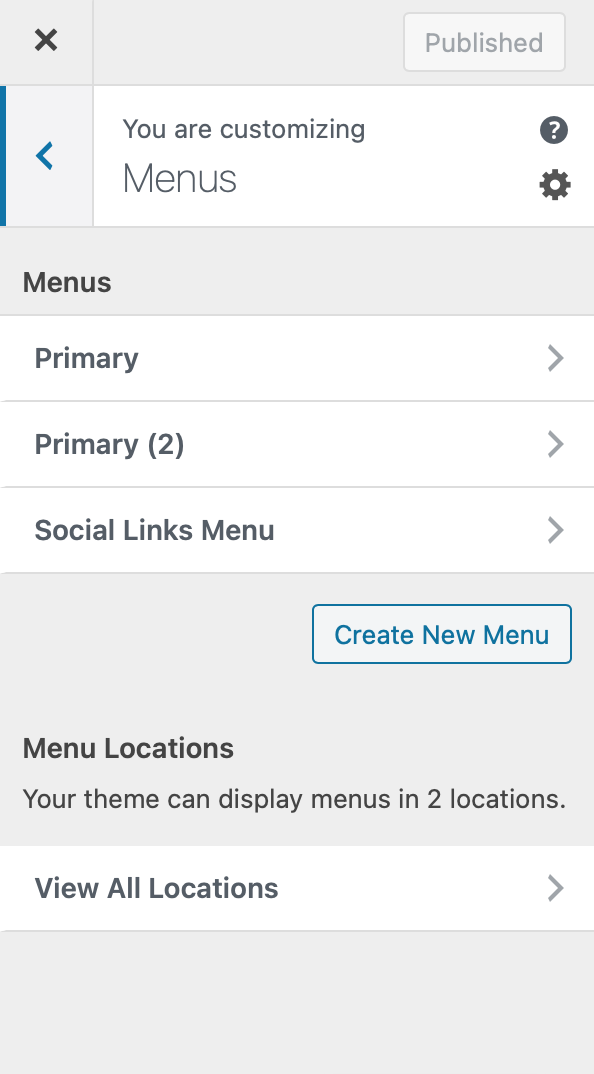
Click the Create New Menu button.
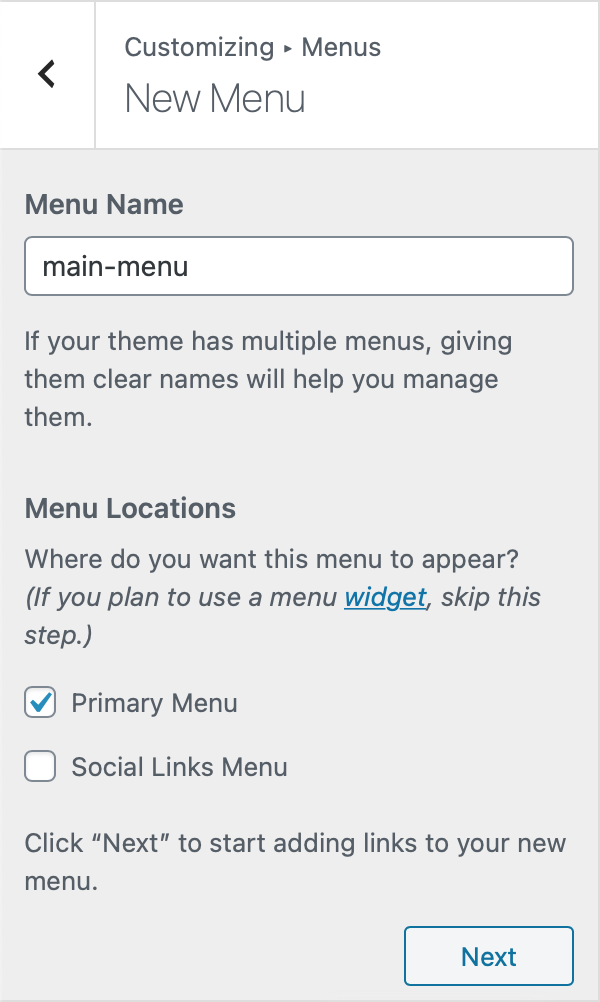
Type in a menu name and click the “Create Menu” button
Type in a menu name. I named mine “main-menu”. Select where you would like this to appear. I selected primary menu. Click Next.
Click the add items button to add items to your WordPress site navigation.
Exercises
- Upload a logo to your WordPress website
- Set a Background Image to your site
- Create a new Menu for your site
Exercise: Explore the Customizer
- With the Twenty Fifteen theme installed, open the Customizer.
- Click on each of the sections on the Customizer panel to see which controls are available.
Exercise: Change the Site Colors
- Using the Customizer for the Twenty Fifteen theme, go to the Colors section and change the Base Color Scheme to purple.
- Change the Header and Sidebar Text Color to #81d742.
- Save your changes
Exercise: Add Text to the Sidebar
- Using the Customizer for the Twenty Fifteen theme, go to the Widget section and add a Text widget to the Sidebar widget area.
- Insert a title and content in the Text widget (e.g., title = “About Me”, content=”I am awesome!”).
- Save your changes
Quiz
How do you get to the screen that allows you to modify the theme?
- By clicking on Customize or Appearance > Customize
- By clicking on Settings or Manage > Settings
- By clicking on Themes
- By clicking on Pages or Site > Pages
Answer: 1. By clicking on Customize or Appearance > Customize
All themes have the same options in the Customizer.
- Yes
- No
Answer: 2. No. (Each theme, and some plugins, determines which options appear in the customizer.)
What items could you update with the Customizer?
- Site’s content
- Items like colors, widgets, header image, background image
- Users
- Plugins
Answer: 2. Items like colors, widgets, header image, background image
After you have selected a theme, can you customize colors?
- No, themes have set colors that cannot be changed
- Yes, theme colors can be customized
Answer: 2. Yes, theme colors can be customized
In the Customizer, where can you upload your logo and title your site?
- Under the Background Image menu
- Under Menus
- Under Homepage Settings
- Under Site Identity
Answer: 4. Under Site Identity
All changes you do on Customizer are being reflected on your site immediately.
- Yes, when I change something on customizer, it reflects right away on the site.
- No, unless I hit “Publish” nothing is being changed.
Answer: 2. No, unless I hit “Publish” nothing is being changed.