Dashboard Overview
In this lesson, you will learn that the WordPress Dashboard is the first screen you see after logging into WordPress. On the Dashboard, you will find both status information and links to all administrative areas of your site. This lesson will show you how the Dashboard is organized and how to navigate it to access the various features of your WordPress site.
Objectives
After completing this lesson, you will be able to:
- Log in to the Dashboard.
- Identify Dashboard components including Admin Bar, Sidebar Menu, Dashboard Widgets, lists, and available links.
- Identify your site’s status information.
- Recognize and use tabular lists that appear on many administrative pages.
- Log out of your Dashboard.
Prerequisite Skills
You will be better equipped to work through this lesson if you have experience and familiarity with:
- Computer concepts (login, logout, window components, tabs, toolbars).
- Navigating and using web browsers.
- Keyboard and pointing device (i.e., mouse).
Assets
- A working WordPress installation containing posts, pages, and media library items
- Login credentials with Admin access
Screening Questions
- Will you administer a WordPress site; including editing posts and pages?
- Do you have access and a login to a working WordPress site?
Teacher Notes
- The teacher should have access to a live Dashboard, either installed locally or on a remote server. This Dashboard should be visible to all students.
- Optionally, students should have access to their own Dashboards, either installed locally or on a remote server.
- The screenshots in this lesson plan are provided only to illustrate the parts of the page under discussion.
- Instructions to the teacher are shown in square brackets.
Hands-on Walk-through
Log In
To login to your site enter the following in the web browser address bar:
yourwebsite.com/wp-admin
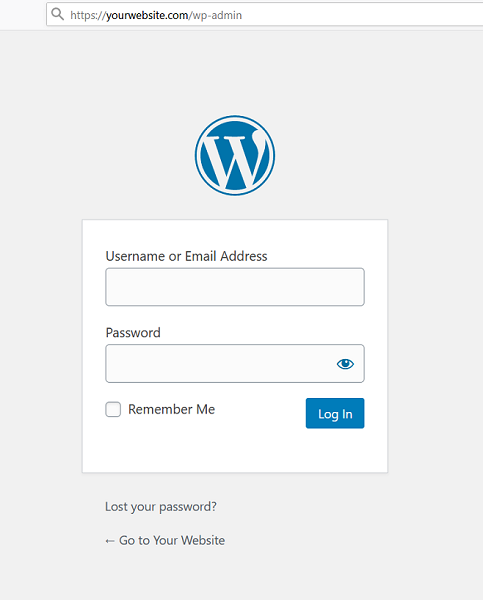
Replace “yourwebsite.com” with the actual URL of your website. Enter your username and password. You can check the “remember me” box if you will be using the same (non-public) computer to return to the website later and want to be logged in automatically. If this box is checked, your browser keeps you logged in for 14 days. If unchecked, you’re logged out when you quit the browser or after two days. If you don’t remember your password, click the “Lost your password?” link below the form. Enter your username or email address and you will receive a link to create a new password via email.
Admin Bar

The Admin Bar is the dark gray menu bar that appears across the top of the dashboard. It also appears across the top of the site itself, when you are logged in. However, it is not visible to public visitors to the site.
At the screenshots embedded further in the text you can see one of the possible dashboard configurations. The dashboard view will change based on what plugins you have active, your hosting company, and how you personally configure it.
WordPress Icon
In the very top left location of the admin bar, you will see the WordPress icon. When you hover over this icon, a dynamic menu with four links appears:
- WordPress.org links to the main WordPress site, which contains downloads and documentation for the WordPress application.
- Documentation links to the WordPress Codex, which is the official documentation for WordPress.
- Support Forums links to the support area of WordPress.org.
- Feedback links to the support forum on WordPress.org that is dedicated to requests and feedback.
Home Icon
The next icon on the admin bar is the home icon for your site. Clicking this link takes you to the public-facing home page of your site. Once you are there, the link in this position takes you back to the Dashboard. It’s a toggle. You might find it useful to have the Dashboard and your main site each open in separate browser tabs so that you can quickly switch back and forth.
Notification Icons
There are two notification icons that can appear in the Admin Bar. Comments are always visible. If there are comments pending on your site, this icon changes color and the number of comments is displayed next to the icon. Clicking the icon takes you to the Comments page. There is also an Updates icon, that appears when there are updates available to your plugins, themes, or the WordPress core files. Clicking this icon takes you to the Updates page.
Hovering over New brings up a menu of links to create new items such as Pages, Posts, or Media items. The actual contents of this list depends on your user role. For example, if your role doesn’t allow you to create new users, you won’t see users in this menu. Some plugins also add items to this menu. Note that this menu duplicates some of the links on the sidebar menu, which we’ll get to in a few minutes.
User Name and Avatar
In the far right corner of the admin bar, you will see your user name and avatar. From this menu, clicking on either your name or “Edit My Profile” will take you to the Edit Profile page. Clicking on Log Out will, well, log you out. Just below the dark grey Admin Bar are two tabs: the Screen Options tab and the Help tab.
Screen Options Tab
The Screen Options tab appears on most administrative pages and it allows you to control the elements that appear on the page. These are the elements that appear to you. When other people log in to the Dashboard, they will see the selections that they have chosen.
Click the Screen Options tab and you’ll see a list of the administrative widgets that are available on that page. Each widget has a checkbox to control its display on that page. [Demonstrate checking and unchecking boxes]. For example, the Screen Options tab on the Posts page lets you manage what is displayed in the table. You can determine which columns are displayed, how many rows the table has, and whether the display is in compact or extended view.
Help Tab
The Help tab, also located directly below the dark grey admin bar, contains information about the current page [open Help]. In this case, it gives you an overview, information about the left-hand navigation menu, how to control the page layout, and the content that you see on the page. Each page in the admin area will display relevant information under its Help tab.
Page Body

In the body of the Dashboard, you’ll find a number of administrative widgets or panels. You’ve seen how these can be shown and hidden using the checkboxes in the Screen Options tab. Their position can also be changed, simply by dragging and dropping them. [Demonstrate dragging and dropping.]
Note that at the screenshot one of the possible WP dashboard configurations is displayed. The dashboardview will change based on what plugins you have active, your hosting company, and how you personally configure it.
There are a number of widgets here that are included when WordPress is installed, including:
- At A Glance. This widget gives you some quick totals for the number of pages, posts, and comments that are currently on your site. It also displays the current theme and will note if search engines are discouraged from indexing the site.
- Quick Draft. Anything entered into this form will be saved as a draft post. That is, it will be saved but not be published on the site. A list of links to currently saved drafts is shown underneath this form. This is handy for jotting down quick ideas for posts that you want to come back and finish later.
- Activity. Activity shows your most recent posts and comments, linked to their respective editors.
- Widgets added by plugins. Some plugins add their own administrative widgets. These can be selected in the Screen Options tab and dragged and dropped, just like those that are installed by WordPress.
Left Sidebar

The most common way of moving around in the admin area is by using the navigation links in the left sidebar. Some of these are used much more frequently than others, particularly posts, pages and comments.
When there are sub-menu items, they are displayed in dynamic fly-out menus [demonstrate] and after you’ve clicked on a menu item with sub-menus, the submenus will be displayed in the sidebar [demonstrate with Posts]. As you can see, these are the sub-menu items available under Posts.
The menu items in the sidebar will vary, depending on the role assigned to you as a user. For instance, a user with the role of Author wouldn’t see any of the menu items that are unrelated to editing posts and pages. Users with the role of Admin will see everything available for the site.
Plugins also add items to this menu, in positions that are controlled by the plugin author.
Posts List

WordPress displays many different collections of items in a tabular format. Plugin authors are urged to display information in this format but some choose not to, which can be confusing.
Open and look at the Posts list page. [open posts if not already open]. When you click on the title of a post, it will open in the editor. However, notice that when you roll the mouse pointer over the title of a post, additional links appear below the title. These include Edit (same as clicking on the title), Quick Edit, Trash, and View. Some plugins add more links here as well.
- Quick Edit allows you to change much of the meta-information about the post, without opening it in the editor. You can quickly change the post’s categories, tags, and several other items that you’ll learn more about later.
- Trash moves the post to the trash folder. You can recover anything that you have put into the trash for up 30 days, unless you have intentionally deleted it or unless your WordPress install has designated a different length of time.
- View links to the publicly visible post on the site.

You can use the checkboxes next to the titles to perform actions on multiple items. After checking one or more boxes [check some boxes], the Bulk Actions drop-down shows you the actions that can be performed. [Click drop-down] As you can see, the actions here are Edit and Move to Trash.
If you select Edit and click Apply, you’ll see the same menu that we did earlier for Quick Edit. Except now, any changes will be applied to all of the items with checked boxes, when the Update button is clicked. Be careful, you can change a lot of things with one click [click Cancel].
Selecting Move to Trash and clicking Apply moves all of the checked posts to the trash folder.
The links above the table will filter the list of posts to show All, Published, Drafts, and Trash. [Move something to the Trash, if there’s nothing there already] When looking at the list of posts in the Trash, the rollover links include Restore and Delete Permanently [demonstrate Restore].
You can also filter the list of posts by dates (month and year) or categories [click drop-downs to demonstrate].
The pagination control allows you to step through the list of items one page at a time.
Lastly, you can search for words or phrases that may be contained in your posts. Any posts that contain the search words will be displayed.
Pages List

The pages list is similar to the Posts list but has fewer columns. This reflects the simpler nature of pages vs. posts. The roll-over behavior remains the same when you move the mouse pointer over a page title. There is still a bulk actions drop-down with the same options that you saw in the Posts list.
Media Library

The Media Library can display items in a grid view, as thumbnails only, or a list view, which is more like the Page and Post lists that you just saw. The only bulk action for Media Library items is Delete Permanently, which is pretty self-explanatory. A column that’s unique to the Media Library is Uploaded to. This tells you on which page or post a particular item is being used. This column may be blank if the item was uploaded directly to the Library and not attached to a page or post.
“Tools” and “Settings”
The left-hand sidebar will also have sections called “Tools” and “Settings”. The contents of these sections are dependent upon the user role and also the plugins that may be installed on the site.
Conclusion
Now you know how to interact with most of the screens that you’ll encounter in the Dashboard and the entire administrative area. The WordPress designers have put a lot of effort into keeping their behavior consistent, as have better plugin developers. If you have a plugin page that looks radically different, you should probably consider replacing it with one that is more up to date. If you see a section on the admin bar that has not been covered here, it is likely that the section was added by a specific plugin. For more specific information, check the documentation for that plugin. Any questions?
Exercises
Hide, show and position Dashboard widgets
Demonstrate the ability to customize the Dashboard.
- Using Screen Options, hide the Quick Draft widget that is shown by default on a new WordPress installation.
- Then make it visible again.
- Drag and drop the Quick Draft widget to a different position on the Dashboard, for example in the third column.
Edit posts using Bulk Edit
Demonstrate the ability to modify posts without opening them in the editor: Using Bulk Edit, add a single tag to one or more posts.
Quiz
The drop-down menu attached to your name and icon in the admin bar allows you to:
- Switch user accounts
- See the website as the public does
- Log out
- Get help
Answer: 3. It shows you the Log Out option.
True or false: “Settings” is always the last item in the sidebar navigation.
Answer: False. Other plugins may add menu items below Settings.
Which of the following appears in the Activity widget on the Dashboard:
- Notification of new WordPress releases
- Recently published posts
- Google Analytics
- Unpublished drafts
Answer: 2. Recently Published Posts
If you find that there is a section on one of your dashboard pages that is missing, the FIRST thing you should do is:
- Use the support forum and ask for help.
- Back up the site and disable all plugins to see if it appears.
- Check the screen options tab at the top right under the admin bar.
- Back up the site and set the theme to a default WordPress theme (ie. Twenty Sixteen).
Answer: 3. Check the screen options tab at the top right under the admin bar.